1 General Information
1.1 Purposes
This User Manual introduces the DEEPSITE Document Insighter - Invoice for users including the interface and management functions to help users quickly log in, browse and use this system.
1.2 System Overview
Document Insighter is a digitizing solution with AI-Powered Advanced Content Intelligence that can be quickly consumed as a service providing the ability to carry out a task like reading a document, digitizing an image or a table, extracting data interested, or any other tasks related to understanding and processing content as well as analyzing data. Document Insighter also provides auto validation/ontology against with the data from user’s database such as enterprise SAP using the extracted data from documents. In addition, Document Insighter supports user feedback and continuous learning to improve precision via the cloud-based portal.
2 Getting Started
2.1 Logging on
Open the browser and enter the URL https://document-insighter.godeepsite.com to visit the login website as shown. User can log in and access DEEPSITE Document Insighter ® Portal through the following URL. On the login page select the button ① “Email” shown in the picture and click “Sign in” and then typing in your trial user account name and password:

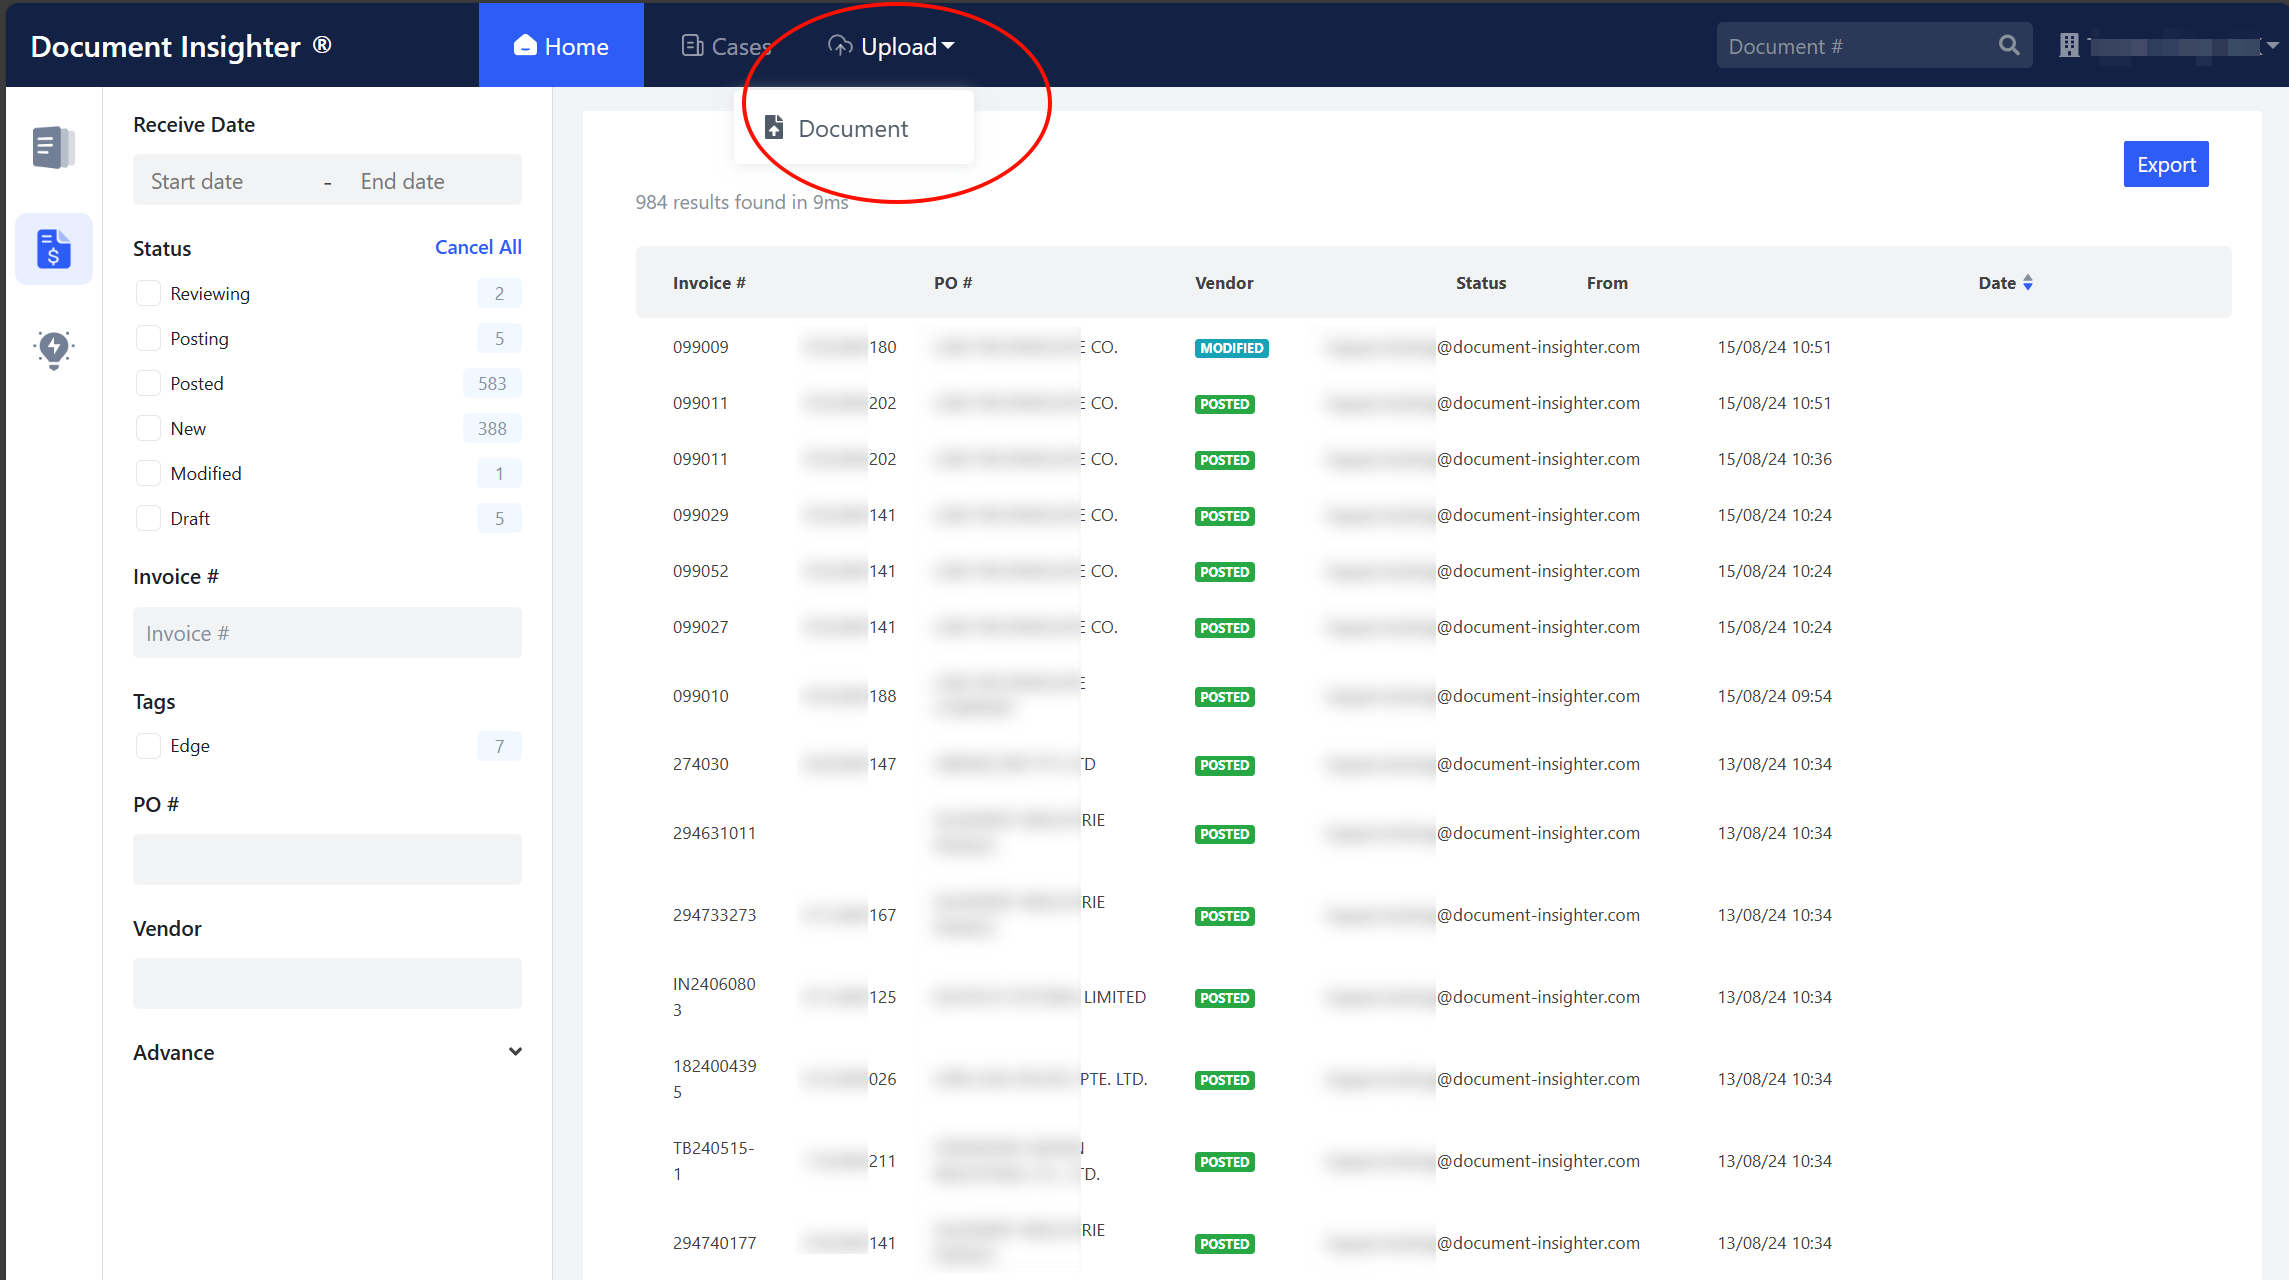
2.2 Homepage
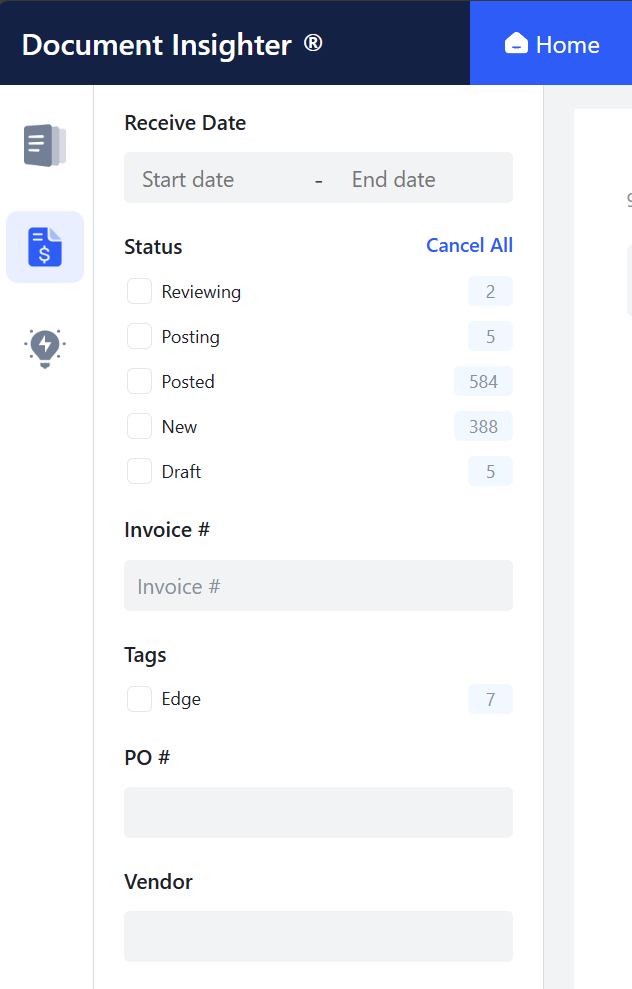
The system can archive data automatically with convenient and rich search capabilities. After logging in, click the “Invoice” icon on the left sidebar of the homepage.
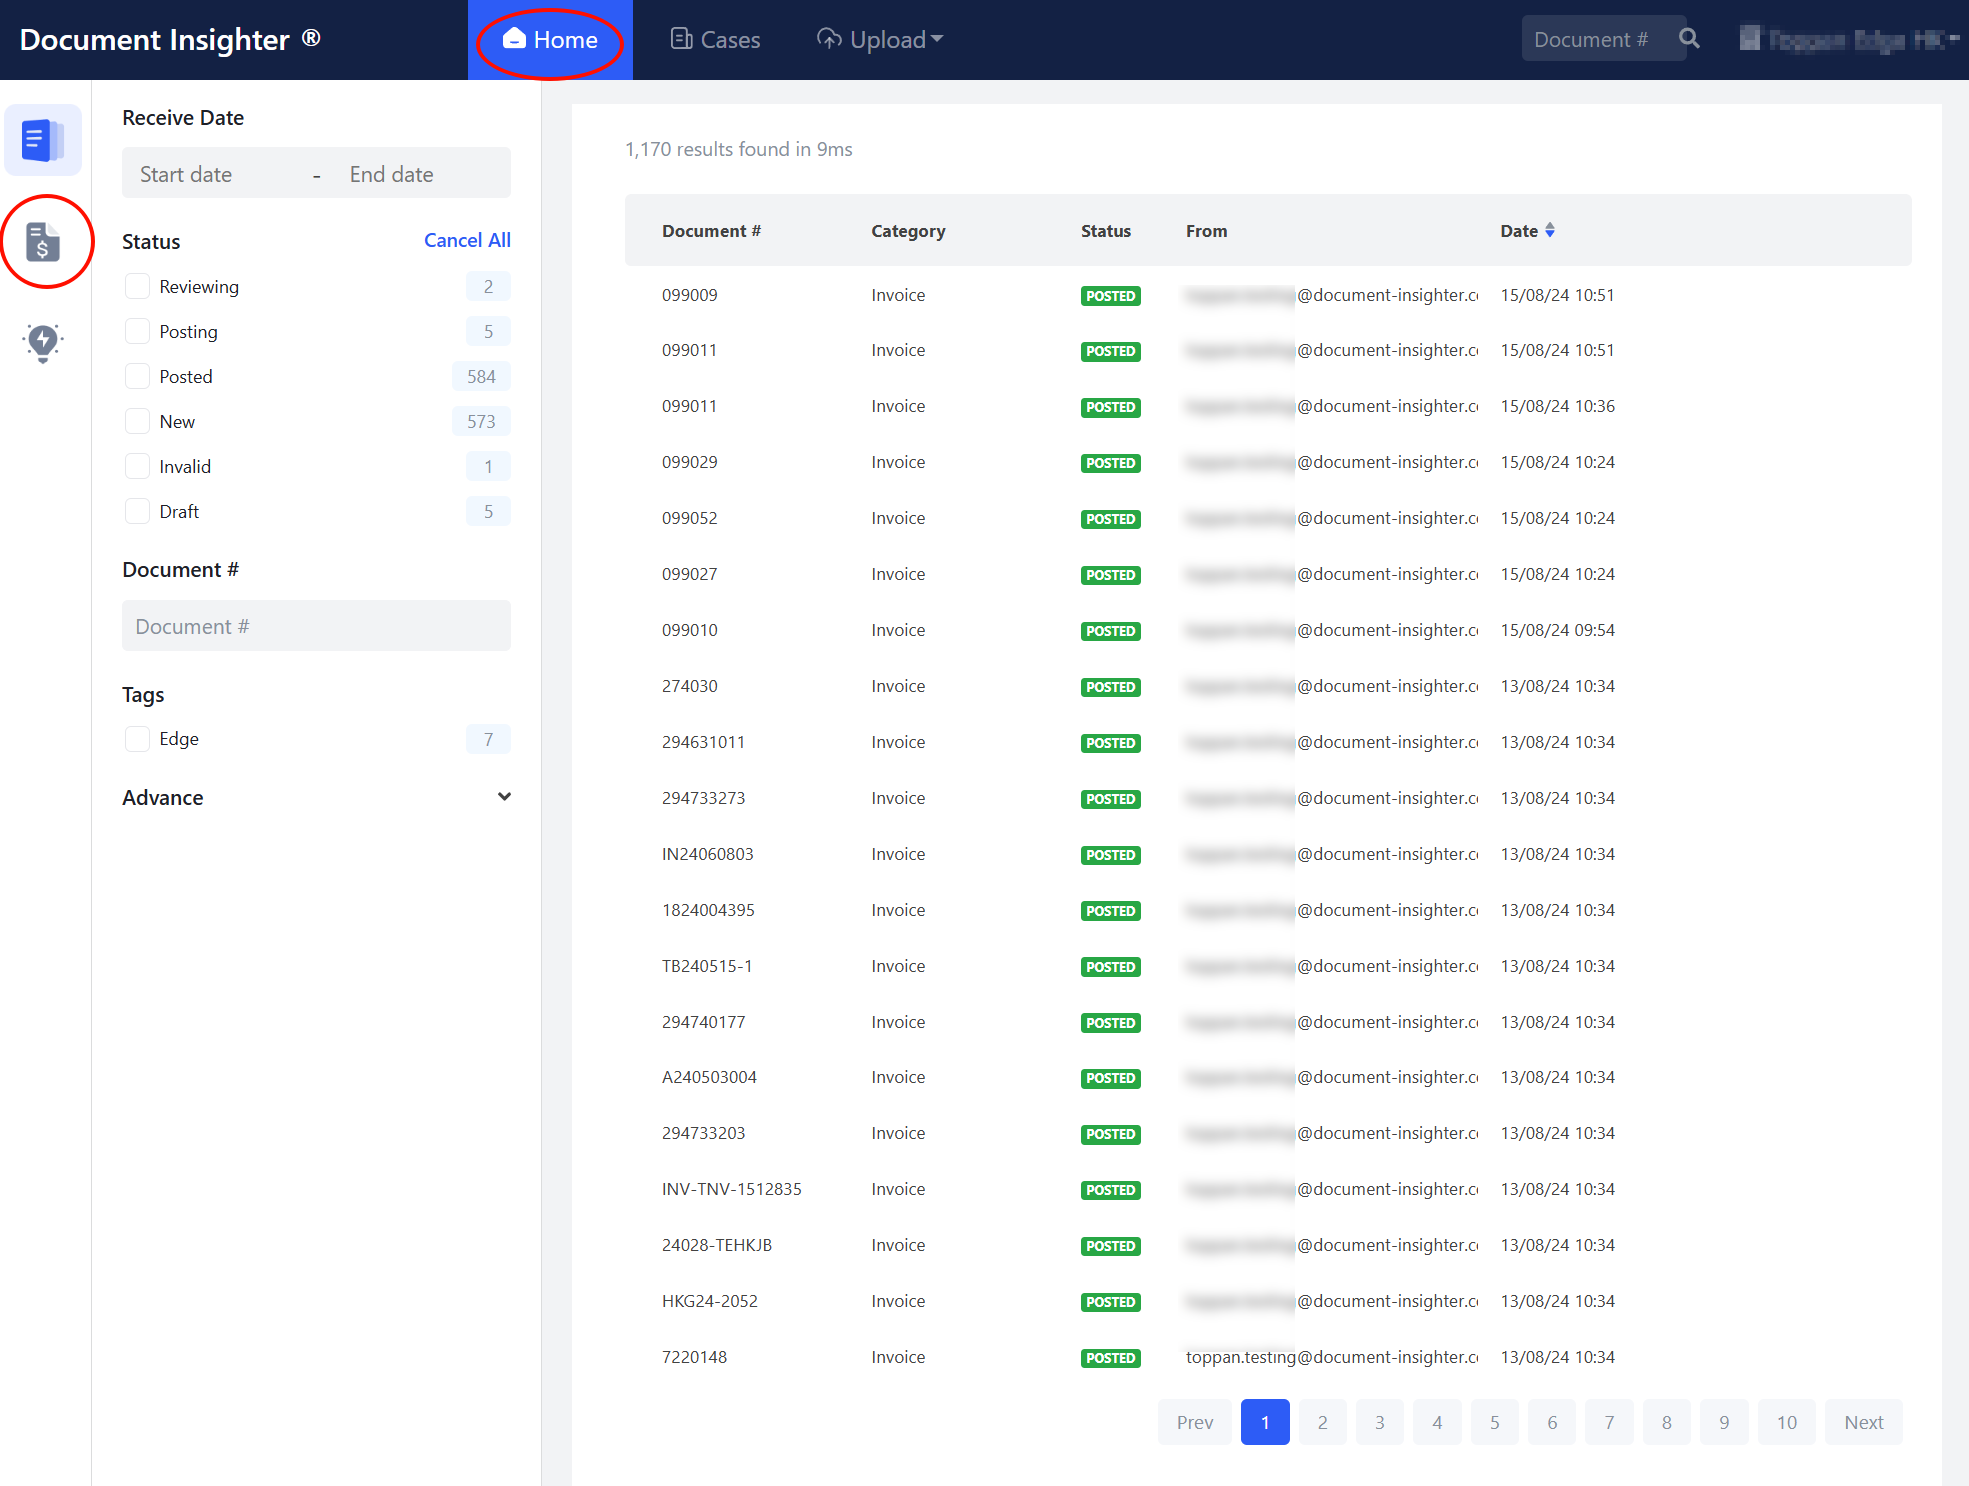
The filter panel provides users with more detailed filtering functions: 1. “Receive Date”: The email received date or uploaded date. 2. “Status”: Document processing status like “Posted” or “Modified”. 3. “Invoice #”: The Invoice number in the document. 4. “PO #”: The PO number in the document. 5. “Vendor”: The vendor name.
2.3 Review Page for Invoice
2.3.1 Extracted Result Display
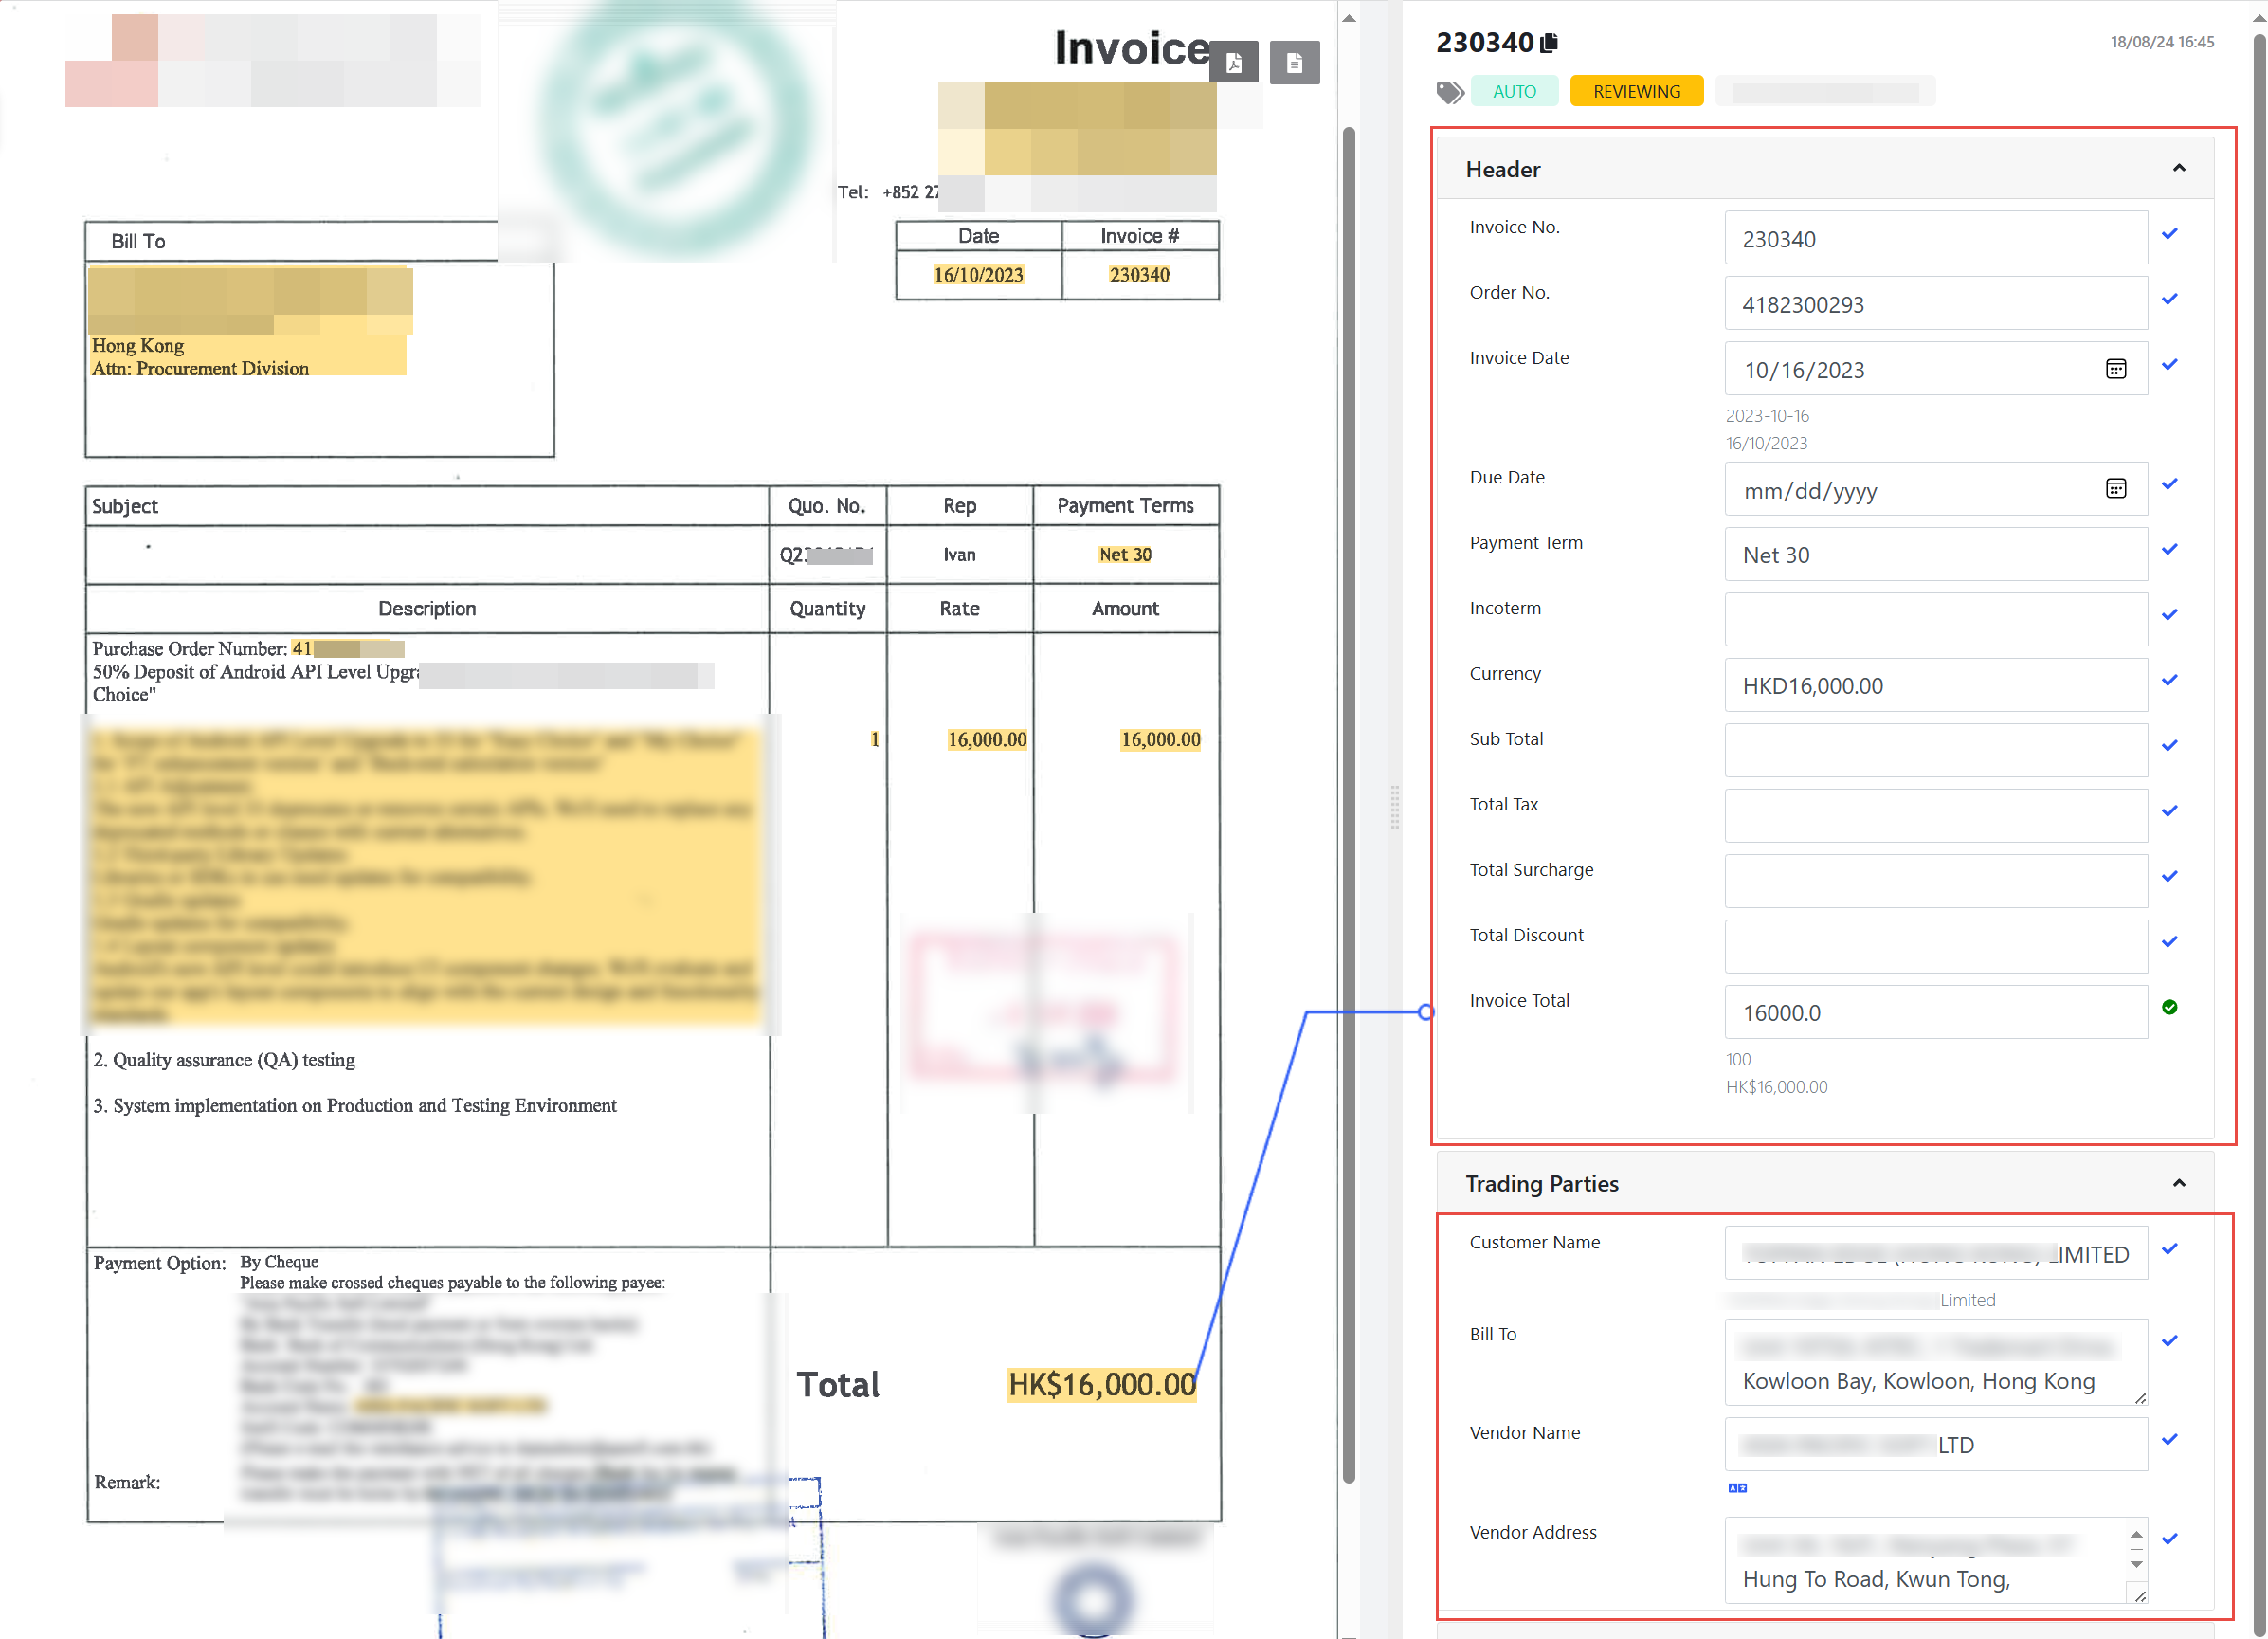
The extracted data, including headers, trading parties information, and line items, will be displayed on the right side of the page. Clicking on the extracted data will highlight the corresponding text in the document, allowing the user to quickly verify the results.
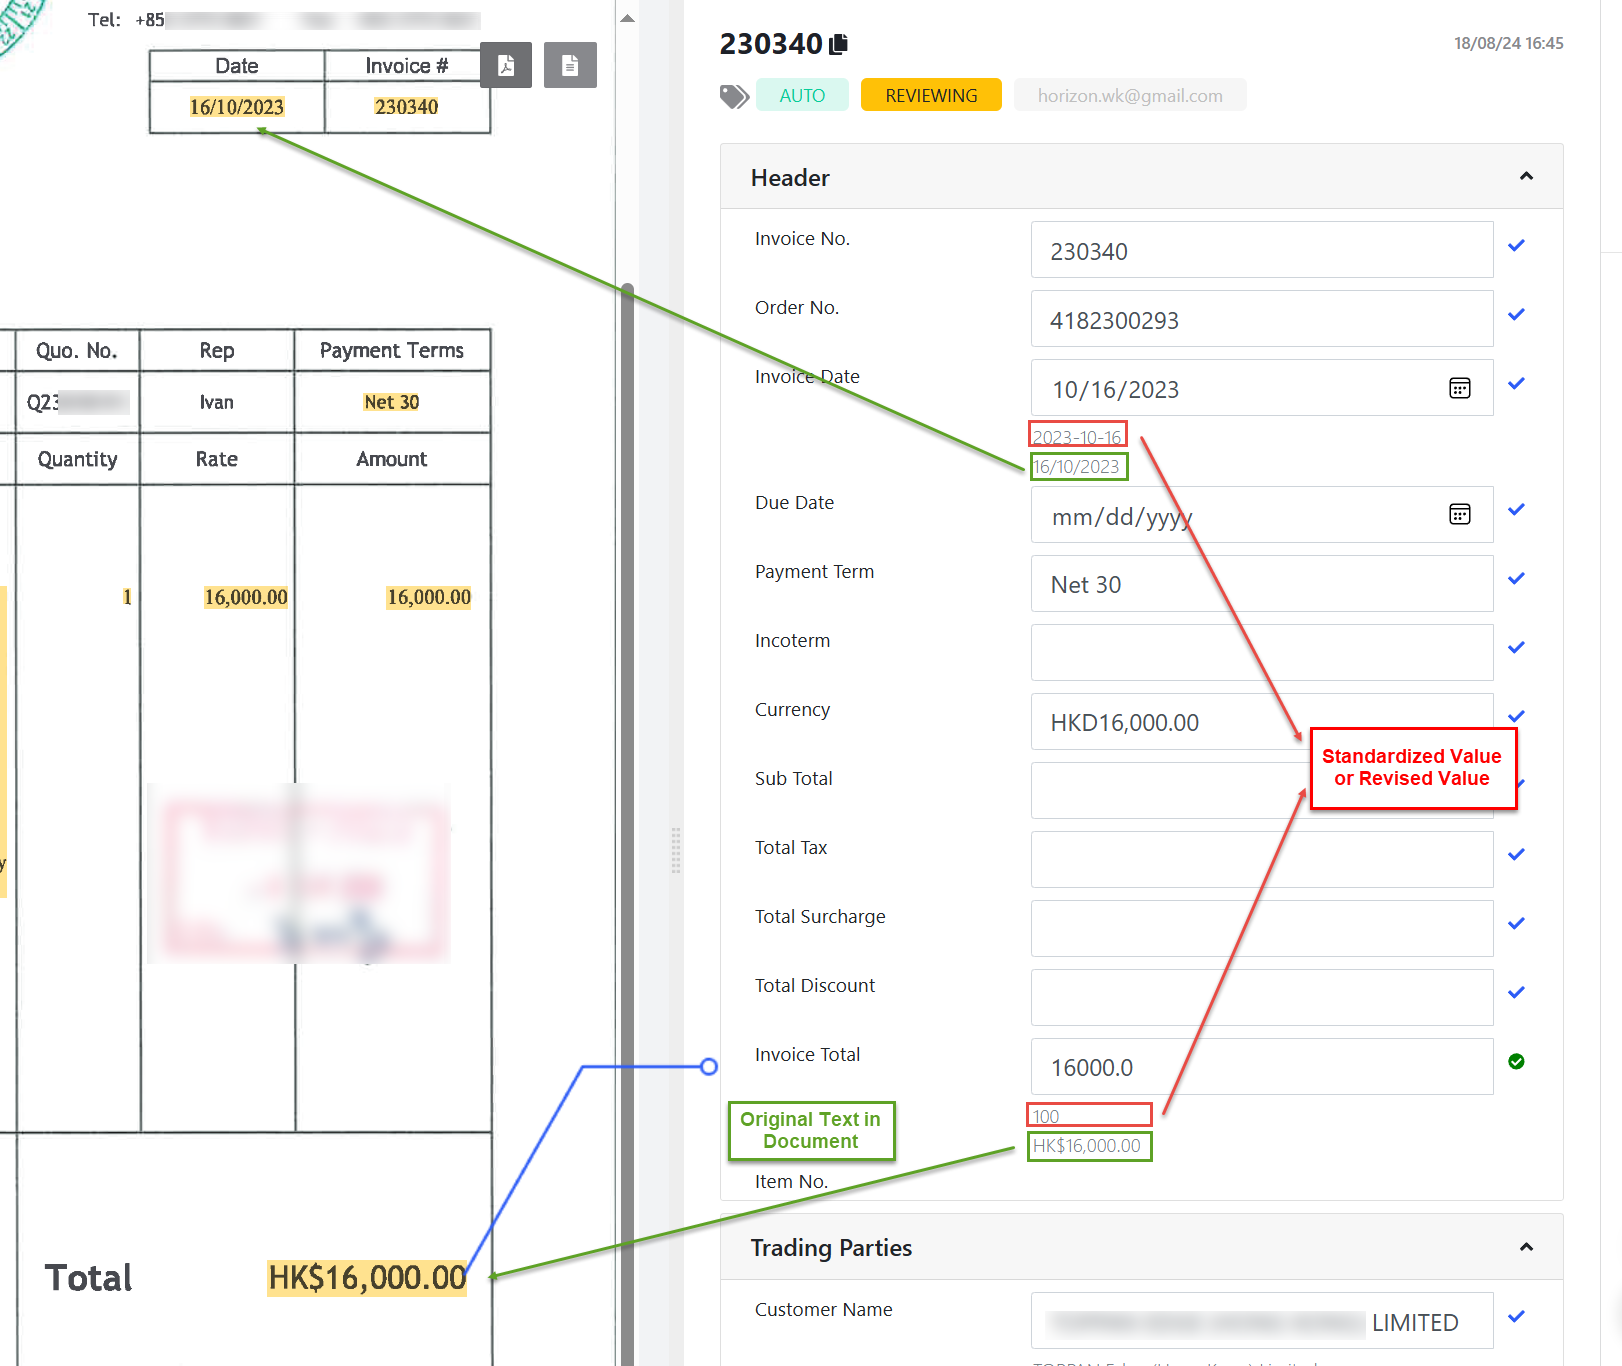
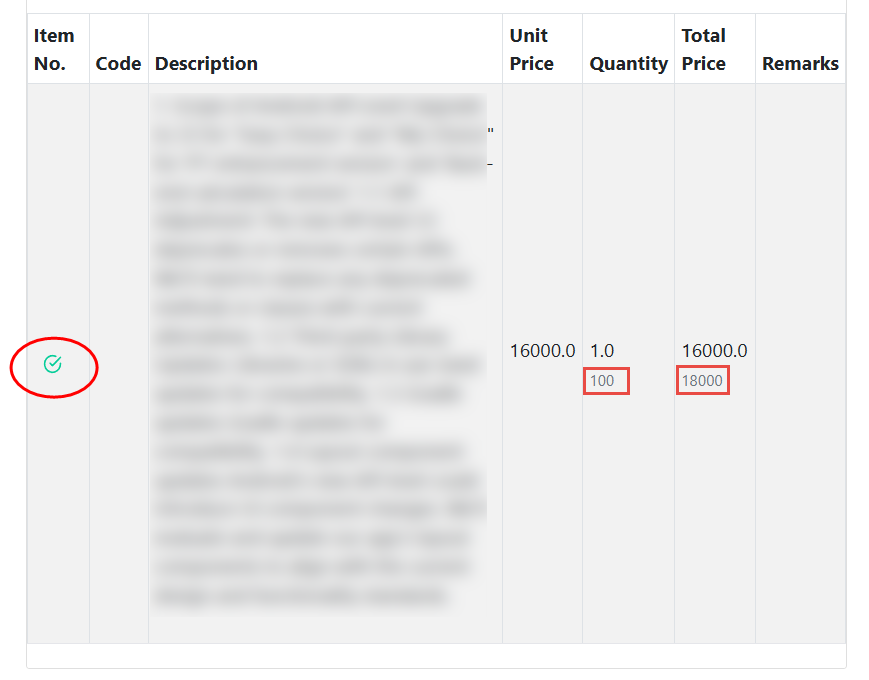
When extracting some numeric and date fields, the system automatically applies some post-processing algorithms to standardize their original values. For example, the “Invoice Total” in the document is represented as “HK$16,000.00”, and the system standardizes it to a float number “16000.0” for easier integration by users. The original text in the document will be displayed in small gray font below each extracted result. Additionally, if users manually modify some extracted results, the modified results will also be displayed under the original results (rather than directly changing the system’s initial extracted results, but the newly modified results will be sent to the user’s receiving server via the Post function).
2.3.2 Revise Extracted Results
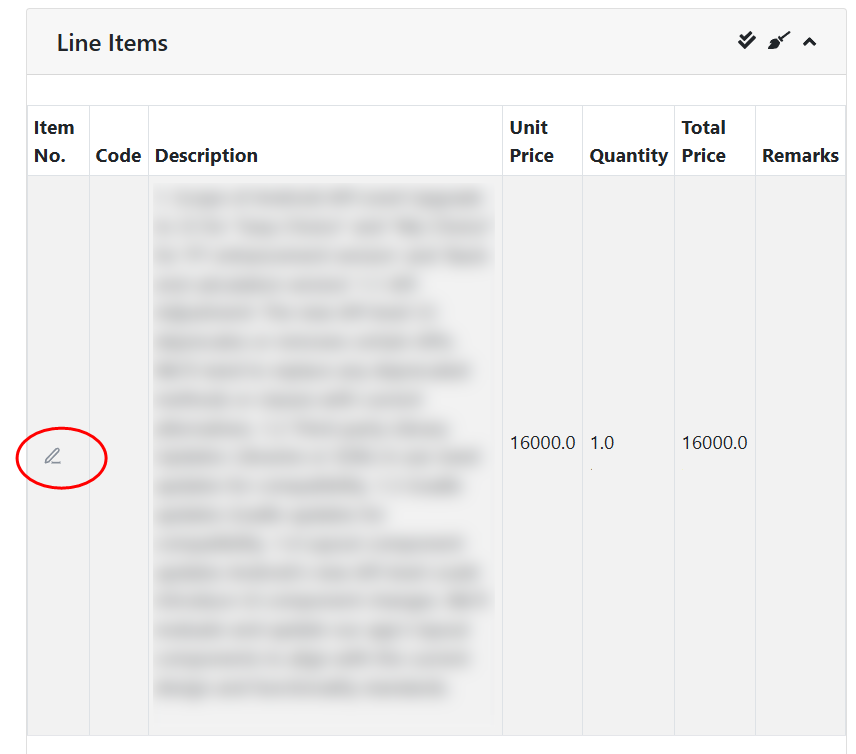
Click the edit icon to open the edit panel and revise the extracted results.
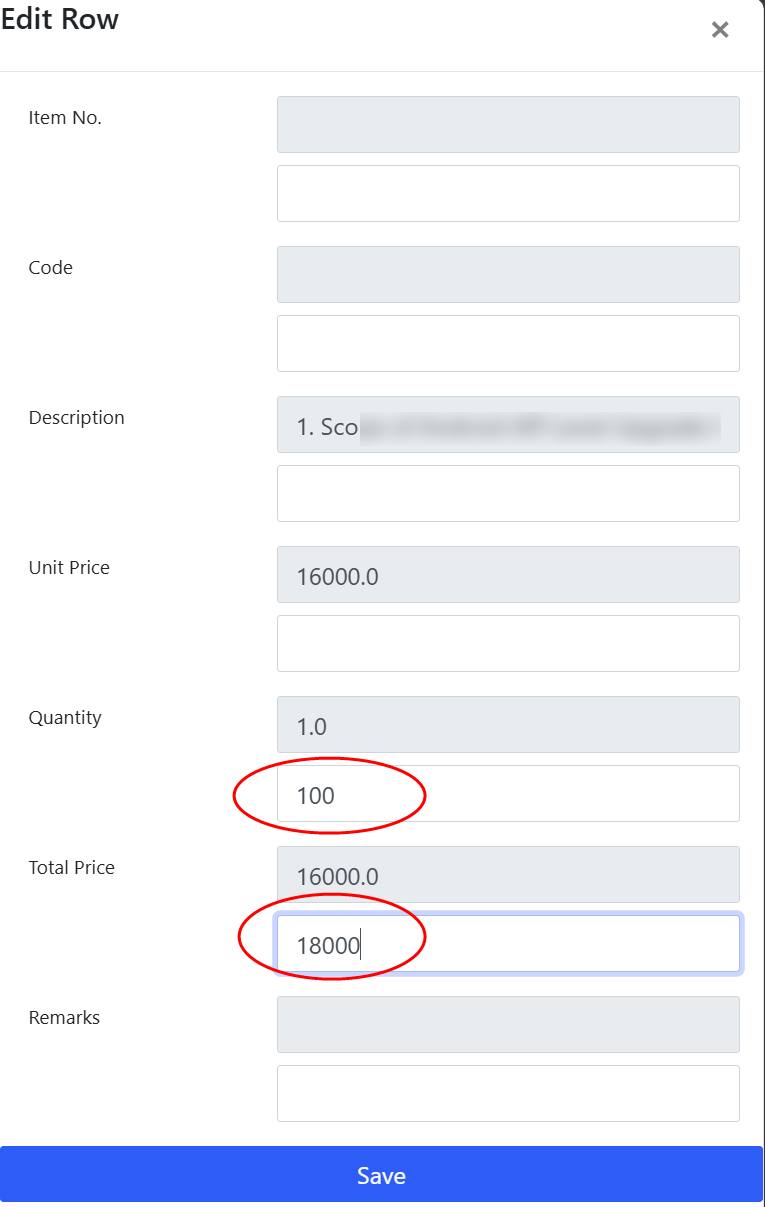
Clicking the “Save” button will display a green checkmark behind the edited item. Hovering over the icon will reveal the last revision record.
2.3.3 Post the Revised Results to Your Server
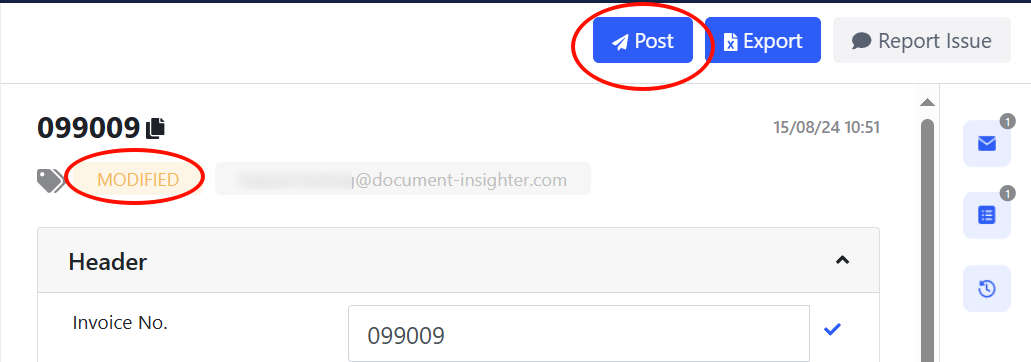
After the user revises and saves the results, the extraction status will change from “New” to “Modified.” The user can then manually send the updated results to the SFTP server by clicking the “Post” button.
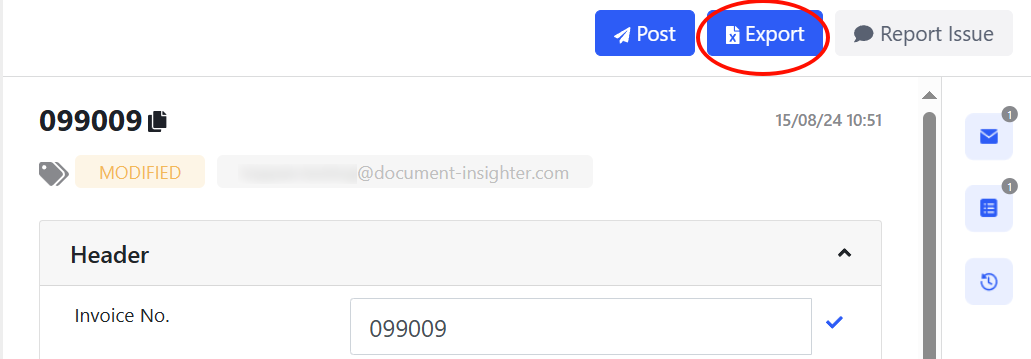
2.3.4 Export Results
Clicking the button ① in the following picture will export the extracted results to Excel file(.xlsx).
2.3.5 Issue Report
The system will gather user feedback on extraction issues as follows:
- Send email directly to support@godeepsite.com for issues like:
* Cannot access the Insighter web portal
* Insighter system related question or queries
* Or other general issues- Report issue for a specific extraction of Invoice documents:
Report issue manually by clicking the “Report Issue” button. Pick an issue category, like “IPC/Extraction” and leave your comment in the dialog.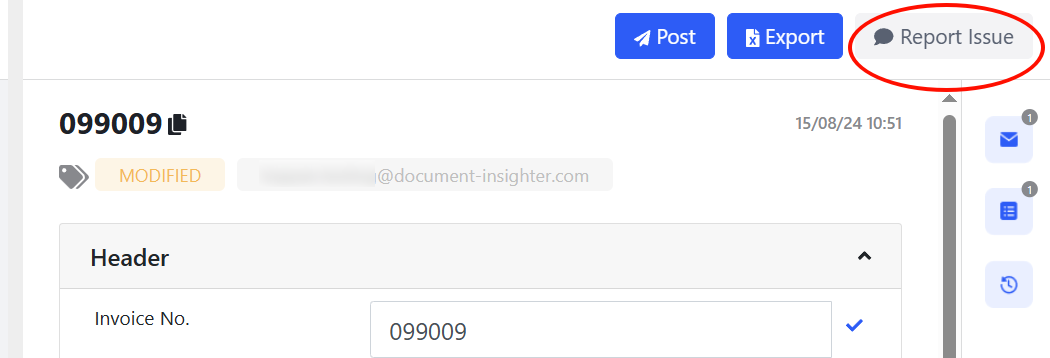
- Users can review the status and details of their reported support cases by clicking button ① to access the “My Support Cases” page.
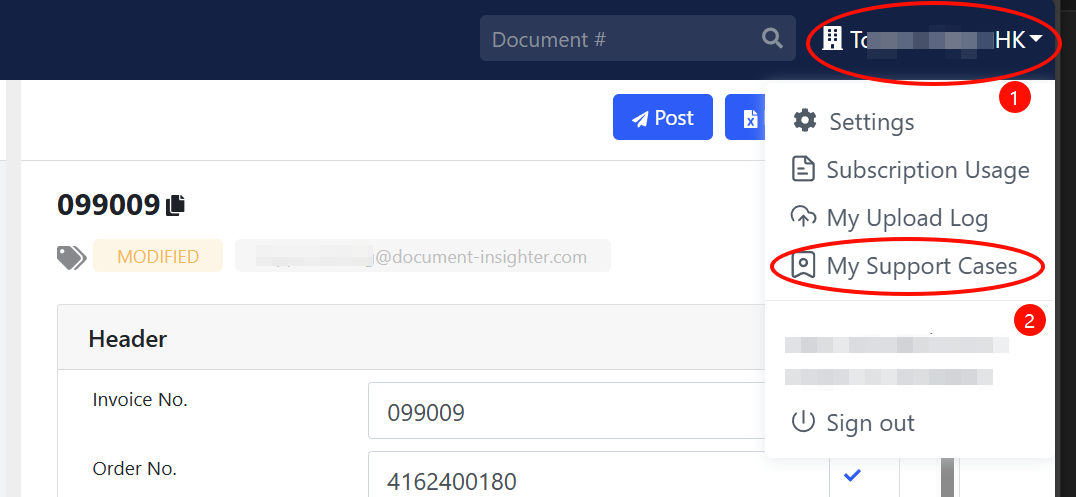
* Our Technical Support team will follow up and comment on the support case within 5 days.3 Uploading Documents
3.1 Uploading via Insighter Portal
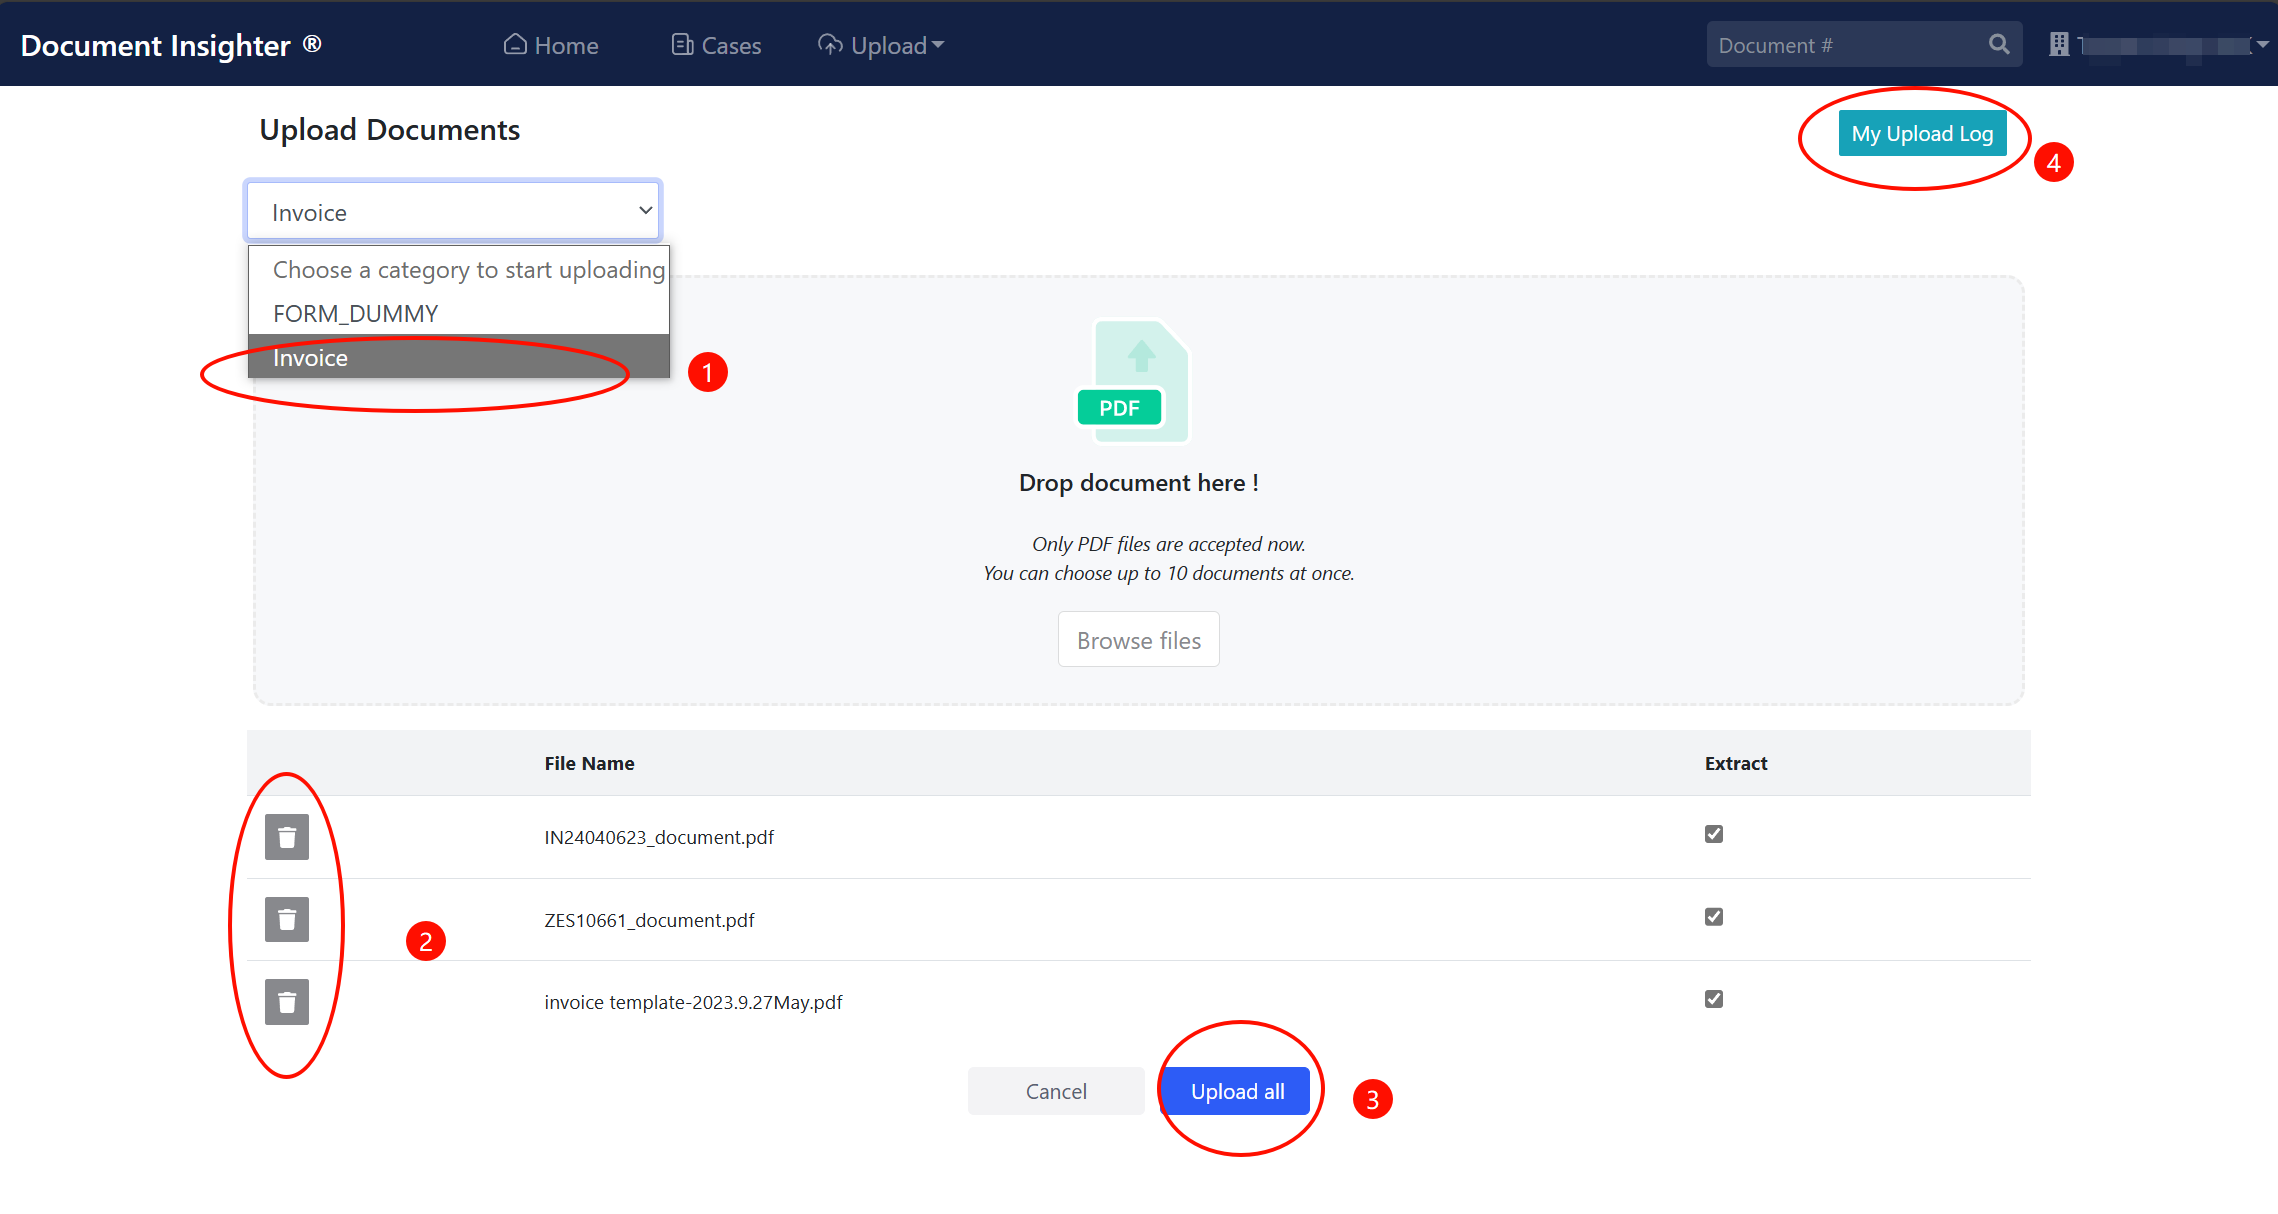
The system supports users upload Invoice and the certain type of Forms document manually. On the homepage of the Insighter portal, users can click the “Upload” button to manually upload documents:
① Users need to first select the type of file they want to upload; ② Users can also delete the files from the uploading list. ③ Once the list is ready, click the “Upload” button to complete the uploading process. ④ Click “My Upload Log” to review all the process status of documents user uploaded. Please note that: • Only PDF files are accepted now. • Users can choose up to 10 documents at once.
4 Technical Support
Help desk information including responsible technical contact phone numbers for assistance is currently available at the following period.
- Phone Support: 9:30 – 18:00 HKT, Mon to Fri
- Email Support (service desk connected): 24-Hours as per Section 3.3 of this agreement.
5 Appendix
5.1 Email Limitation and Requirements
Do not send the same Invoice document to the shared mailbox multiple times.
Please note that our system can read PDF/JPG/PNG/TIF format and the COA documents should be attached directly to the email. The size of one e-mail can’t exceed 5MB. Our system is not able to open attached emails and Zip folders.