1 General Information
1.1 Purposes
This User Manual introduces the DEEPSITE Document Insighter system including the interface and management functions to help users quickly log in, browse and use this system. And provide you with solutions to the problems encountered in the use of the system and how to access the resources and help.
1.2 System Overview
Document Insighter is a digitizing solution with AI-Powered Advanced Content Intelligence that can be quickly consumed as a service providing the ability to carry out a task like reading a document, digitizing an image or a table, extracting data interested, or any other tasks related to understanding and processing content as well as analyzing data. Document Insighter also provides auto validation/ontology against with the data from user’s database such as enterprise SAP using the extracted data from documents. In addition, Document Insighter supports user feedback and continuous learning to improve precision via the cloud-based portal.
2 Getting Started
2.1 Logging on
Open the browser and enter the URL https://document-insighter.godeepsite.com to visit the login website as shown:
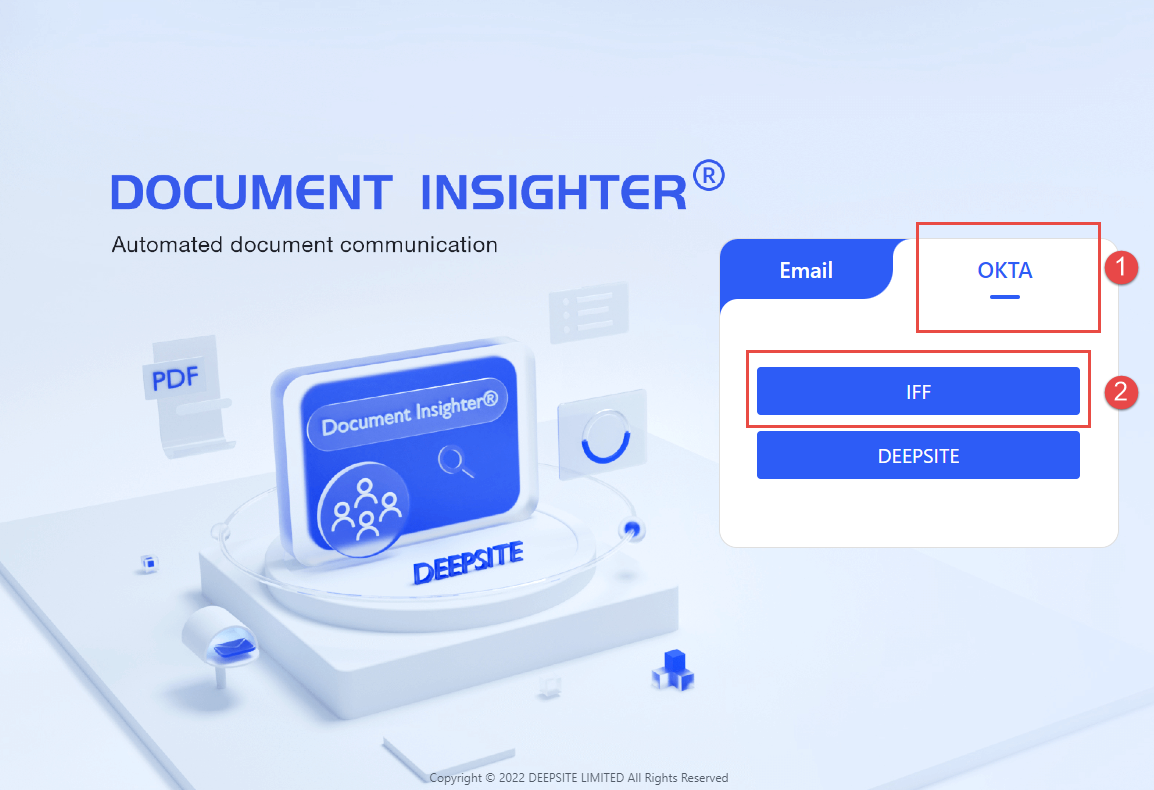
Users can log in the DEEPSITE Insighter portal by clicking button ① “OKTA” and choosing “IFF” and then typing in their authorized account name and password.
2.2 Role Types
Users belonging to different role types will have different permissions:
| Role Type | Access | User Profile | Permission Level |
|---|---|---|---|
| Viewer | view/access portal | users/technicians | default |
| API User | pull data from API | data scientist/IT | default |
2.3 Homepage
The system can archive documents/data automatically with convenient and rich search capabilities. After logging in or clicking the “Home” button in the top ribbon to enter the home page, as shown.
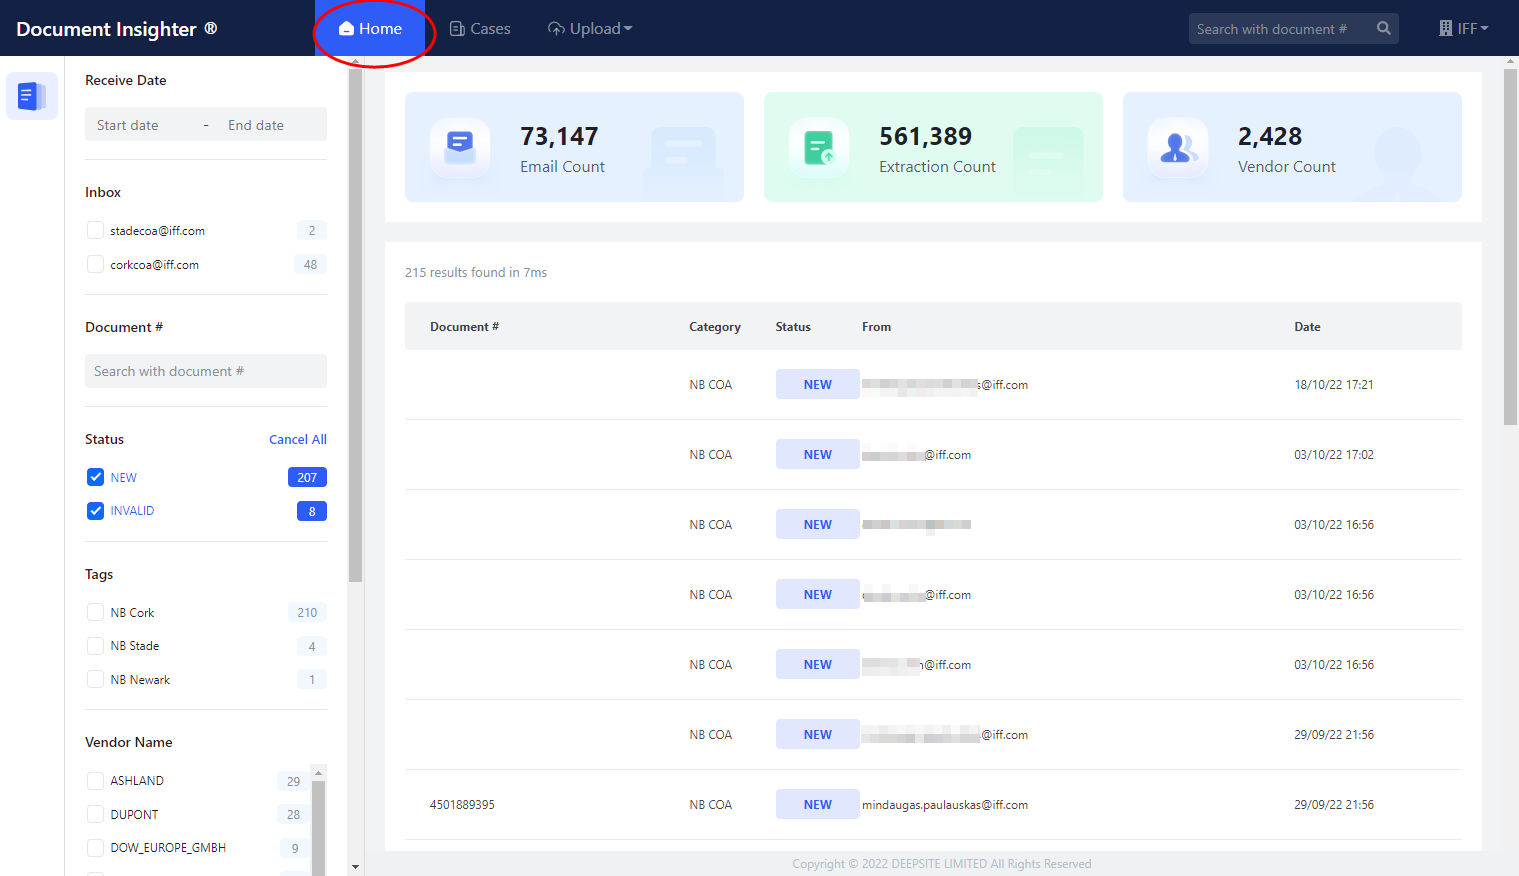
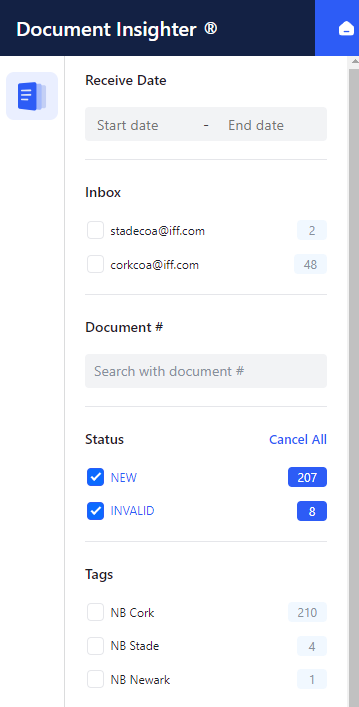
The left filter function bar provides users with more detailed classification and filtering functions:
- “Receive Date”: The email received date or uploaded date.
- “Inbox”: Which shared mailbox the email/docs came from.
- “Document #”: The number of OCR document, like PO number.
- “Status”: Default value is “NEW”. If user revised the results, it will become “MODIFIED”.
- “Tags”: Which plant the docs should belong to.
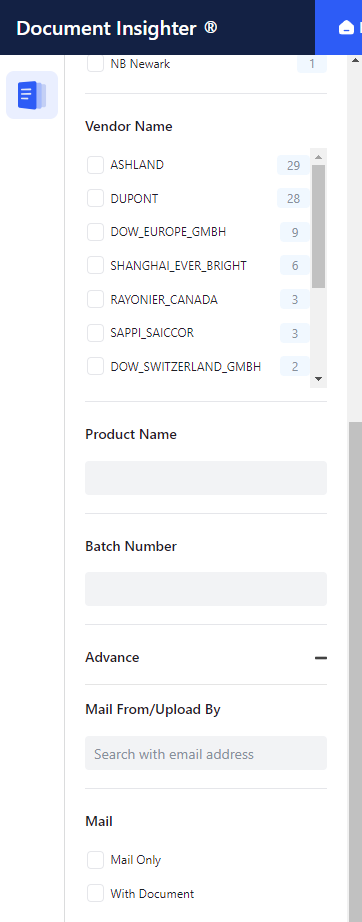
- “Vendor Name”: List all vendors.
- “Product Name”: Filterd by the mapped standard product name if it exists.
- “Batch Name”: Filterd by the extracted batch number if it exists.
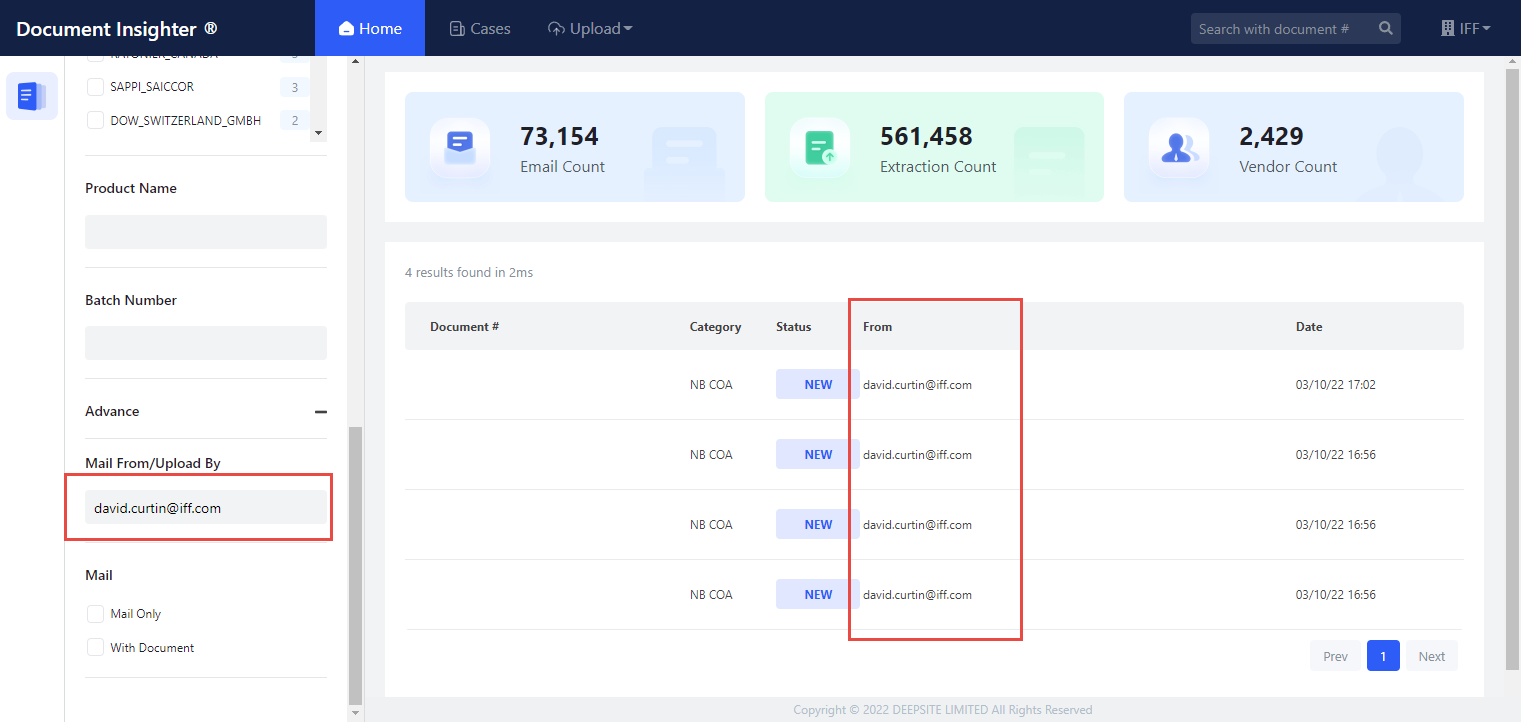
- “Mail From/Upload By”: Filter all the extractions by User’s email address.
- “Mail/Document”: Filtered by the type of COA(only email or email with documents attached).
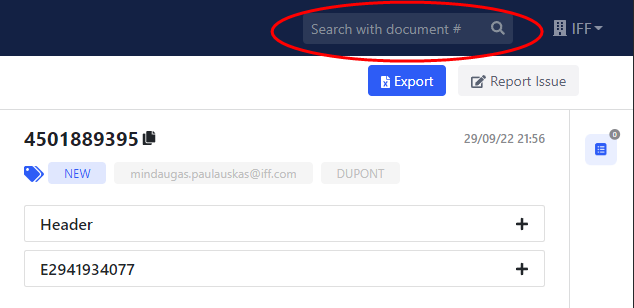
2.3.1 Quick Search Area
Users can quick access the search function at the top ribbon. After entering the PO number here, it will jump to the corresponding review page.
 ## Review Page
2.3.2 Display and download the original documents and email
After logging in, the COA document if existed and email will be shown in the left side of the page. User can also down the PDF version of the document file or the eml version of the email by clicking the download button.


2.3.3 Extracted Result Display
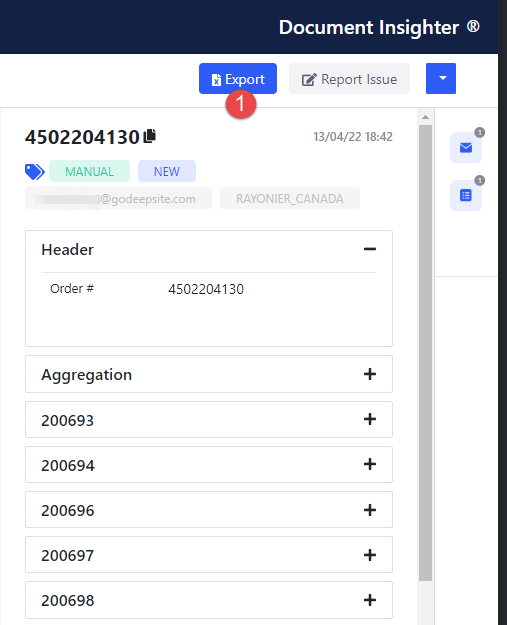
The extracted data will be shown in the right side of the page including Test parameter results and mapped Spec codes. Clicking the button ① in the following picture will display the historical extracted records of the COA under the same PO number:
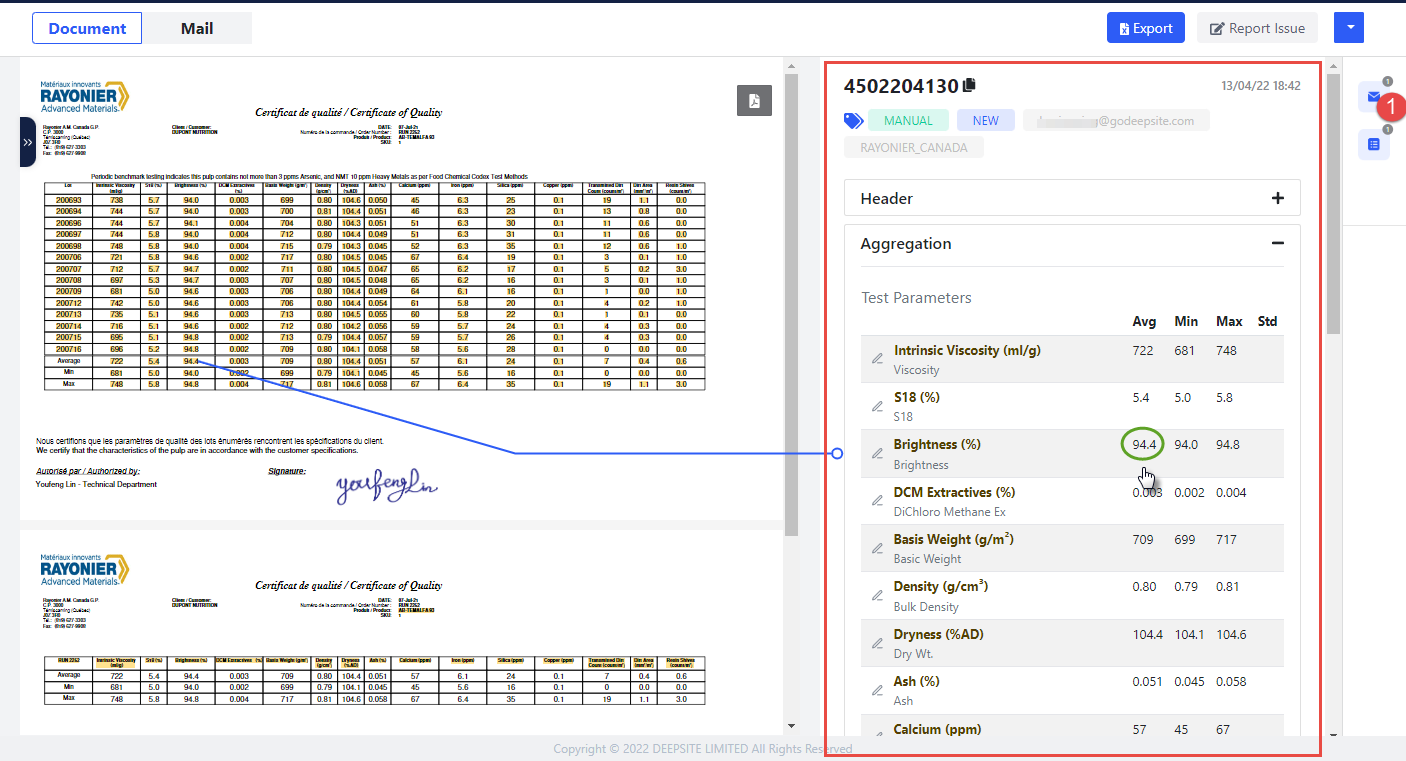

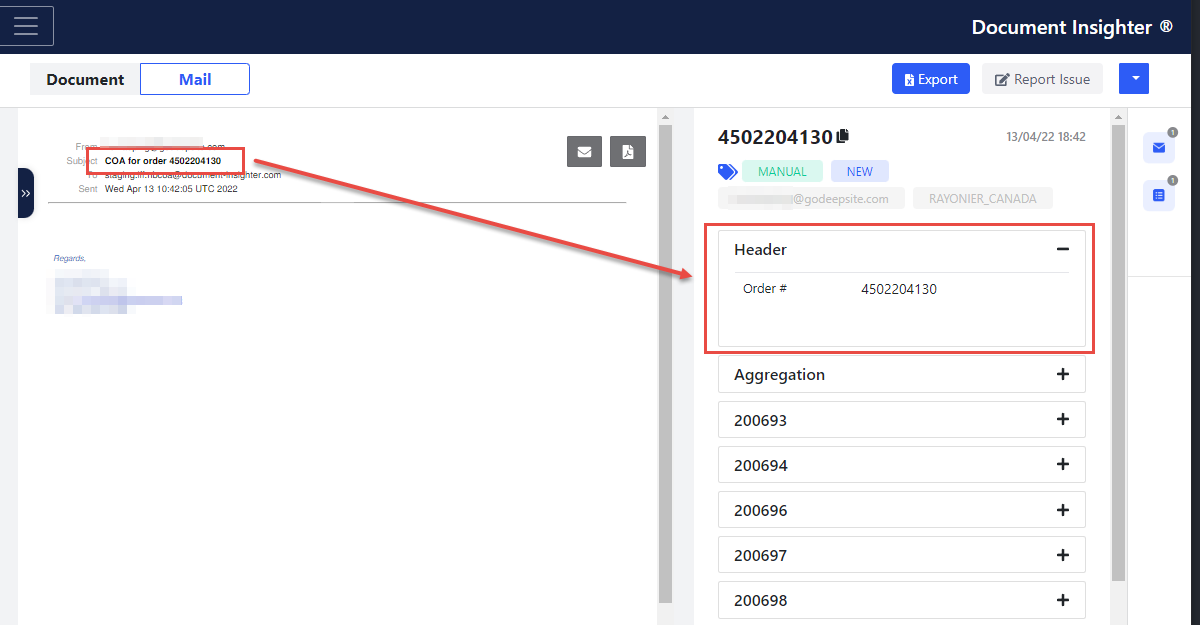
The “Header” in the right side panel shows the PO number extracted from the document, emial subject or the user input when they uploaded the file manually.
The “Aggregation” part shows the cross-batch aggregation statistics for each test parameter in the COA document.
Click the “Batch Number”, user can review the detailed test result including “Manufacturing Date”, “Product Name” and test values for each batch.
 ### Multiple Batches Case Support Document Insighter supports users email or upload COA documents with multiple batches in a mail now.
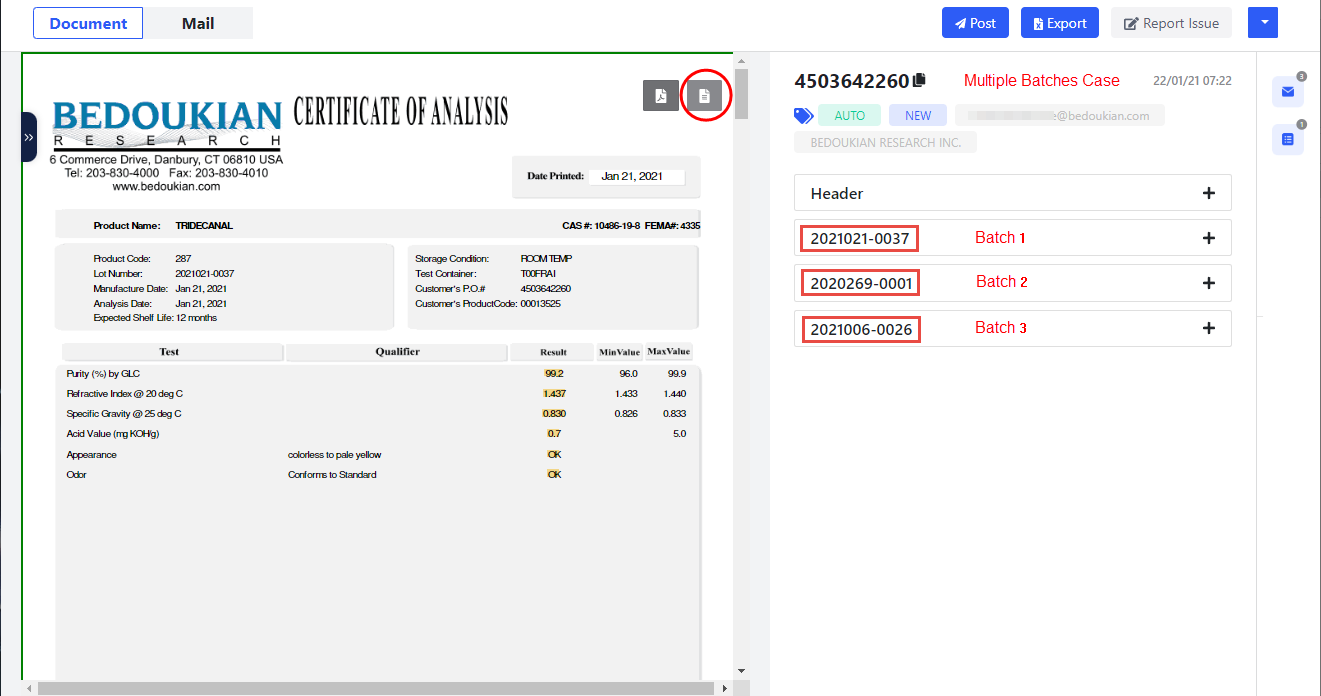
Click the button ①, the pdf document browser window on the left will automatically jump to the current extraction(current order) and highlight the corresponding pages.
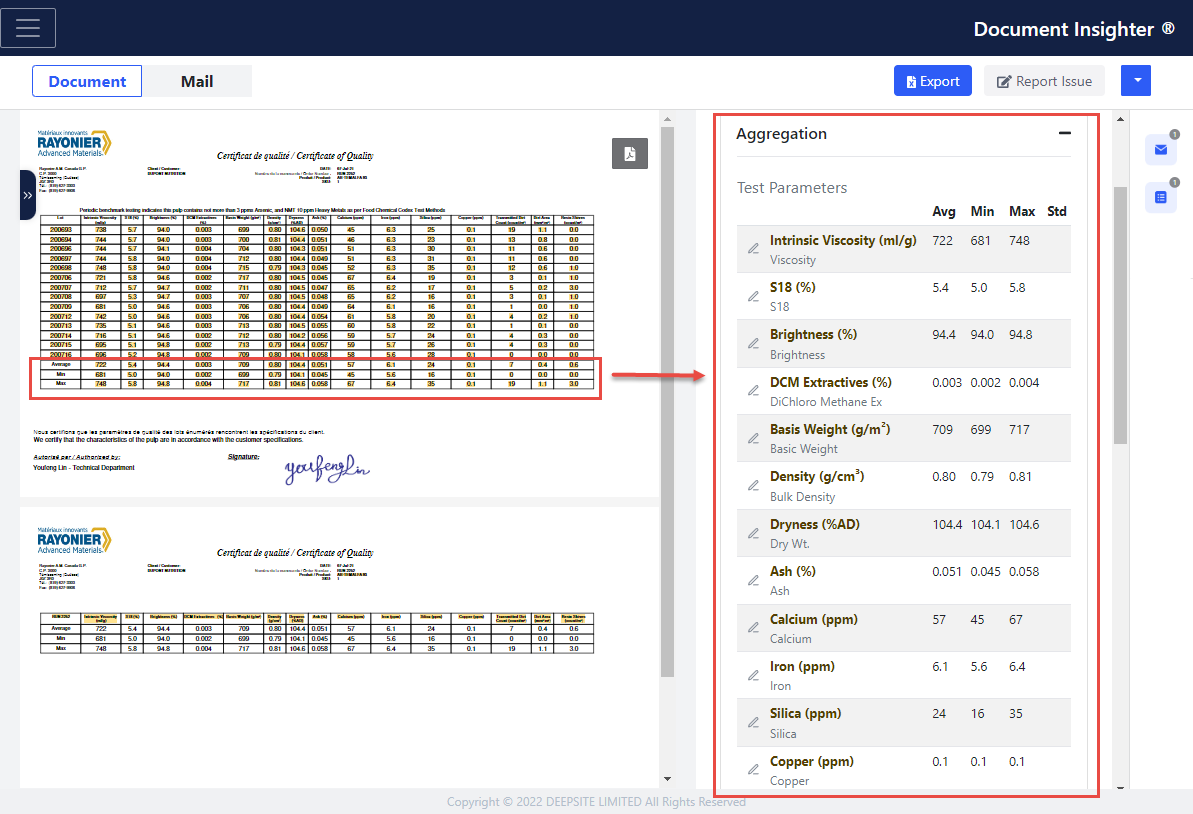
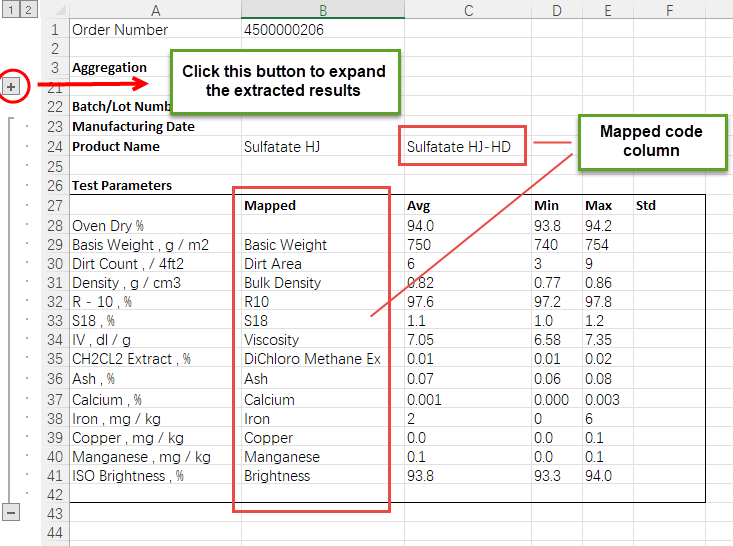
2.3.4 Ontology Result
The contents in the following picture with the red box show the extracted test values in vendor’s COA document. Our ontology engine will map it to the your standard SpecCode/Product name automatically.

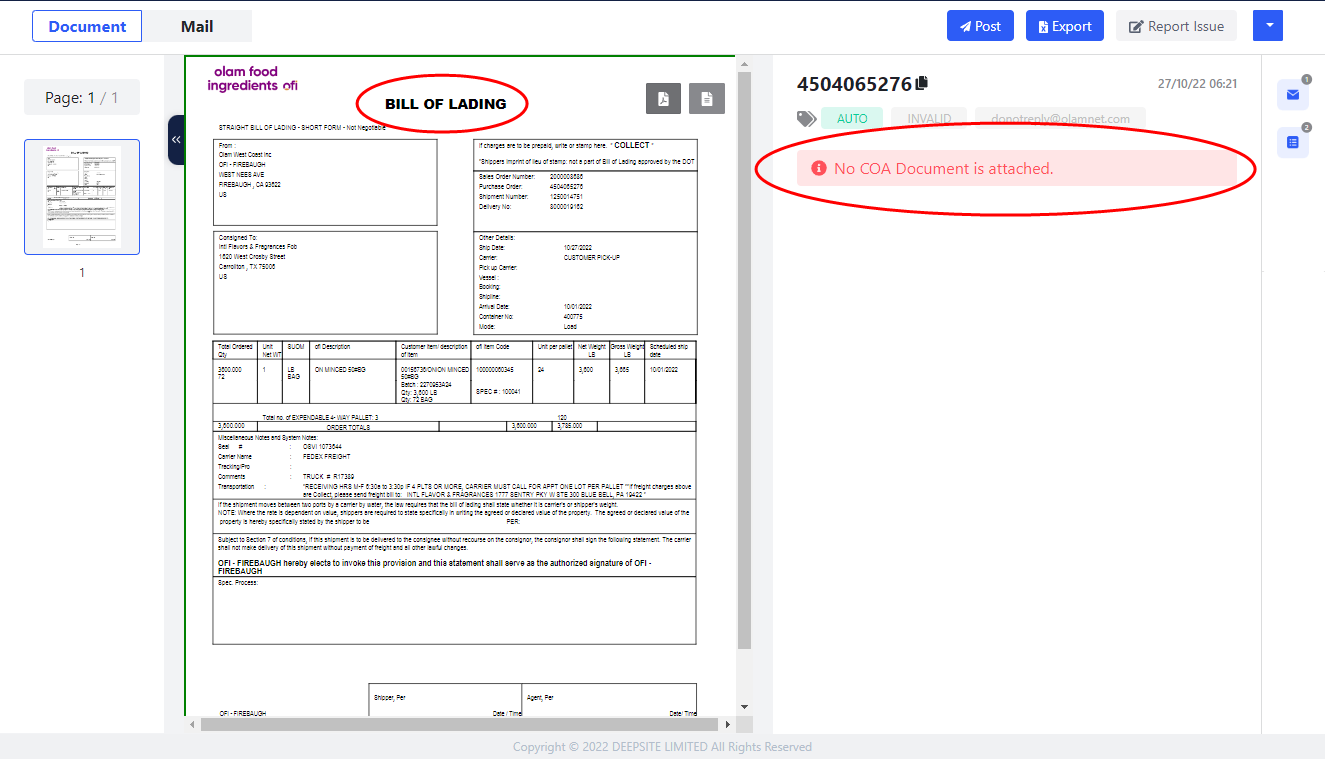
2.3.5 Extraction Validation
The system considered three main factors to do the validation: PO #, Batch# and document type. Users can find all the archived “Invalid” mails in the portal homepage through the Status Filter:
Click the extraction to enter the review page, then the specific Error Message shows at the top of the “Text Result” in red, which include the following possible cases:
- No PO number found.
- No Batch number found
- No COA Document is attached.
2.4 Main Functions
2.4.1 Review Extracted Results and Auto Highlight
Clicking on each extraction result will automatically jump to the corresponding position in the document

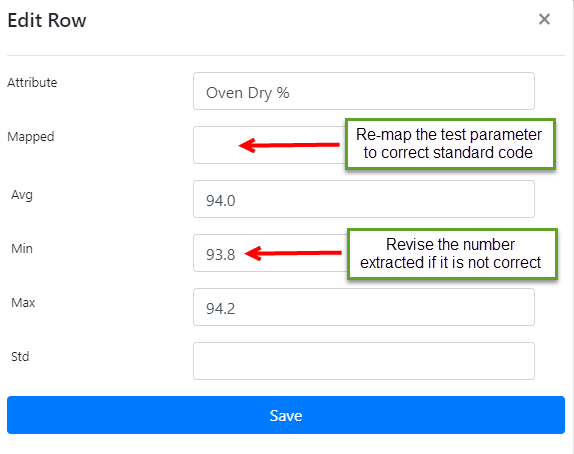
2.4.2 Revise Extracted Results
User can open the edit panel to revise the extracted reuslts by clicing the edit icon.

User can change the default mapped code to others if it is not correct or just leave it blank if it is not the critical one, also can revise the test value extracted.
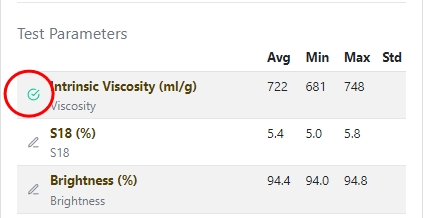
After clicing the “Save” buttton, there will be a green ticker icon appeared behind the item user edited before. When you hover the mouse on the icon, it will show the last revise record information.
2.4.3 Export Results
Clicking the button ① in the following picture will export the extracted results to Excel file(.xlsx).
2.4.4 Issue Report
For most cases, even in some new document formats/layouts, our A.I. engine can automatically detect and extract the tables and data points that users are interested in. For some processing failure cases, the system needs to collect samples in order to finetune the model and continuously optimize model performance. The system will collect user feedback on extraction issues in the following ways:
- Send email directly to support@godeepsite.com for issues like:
* Cannot access the Insighter web portal
* Insighter system related question or queries
* Or other general issues- Report issue for a specific COA document:
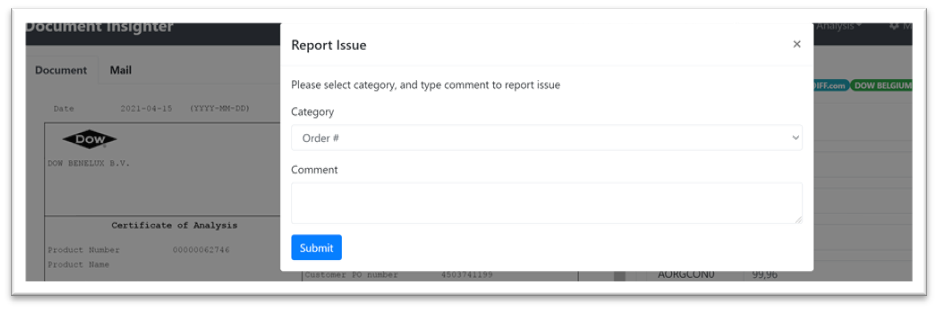
Report issue manually by clicking the “Report Issue” button. Pick an issue category, like “IPC/Extraction” and leave your comment in the dialog.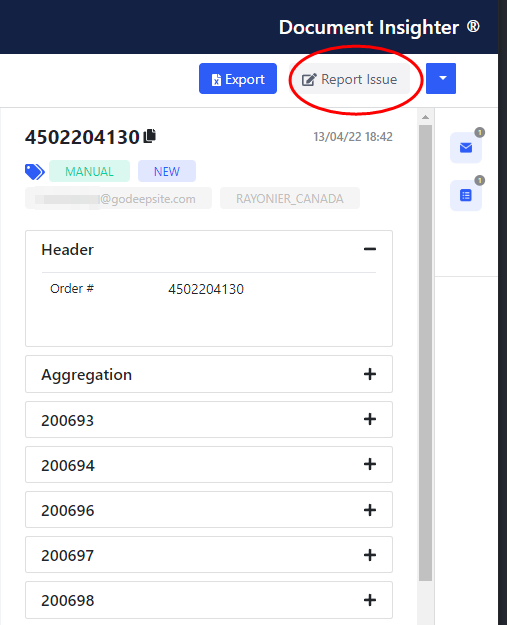
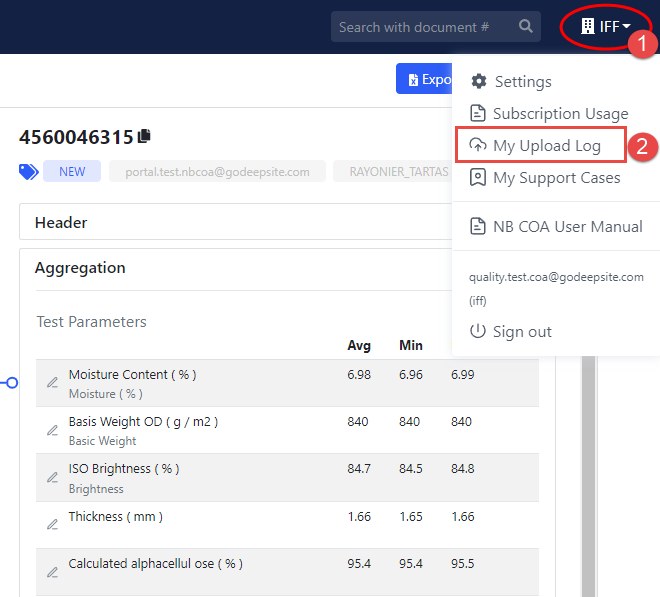
- Users can check the status of following up and review all the support cases/issues they reported by clicking the button ① to open the “My Support Cases” page.

* The system will forward this issue to our Technical Support team, the team will follow up on the issue, and update you within 4 days.3 Process for Manually Uploading COA
The system support users upload the COA document manually through the following methods:
- Scan the document by desktop Scanner and send to COA processing mailbox
- Scan the document by MS Lens or MS Office Mobile App and share to COA processing mailbox
- Upload the PDF version of COA documents via the Insighter portal upload function
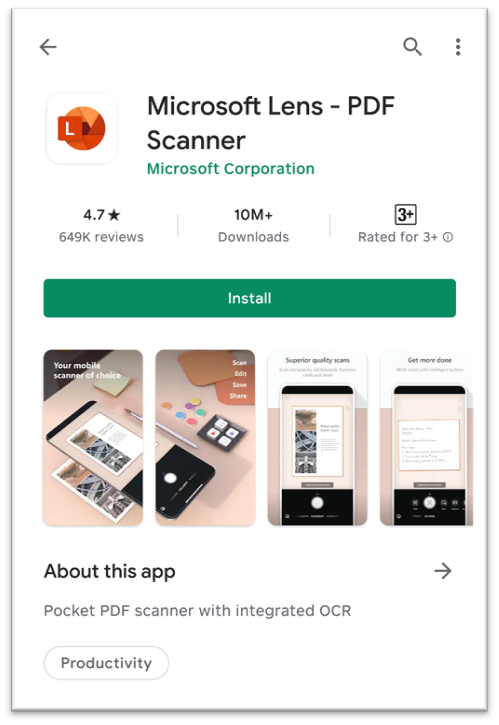
3.1 Uploading via MS Lens
Users can install the Microsoft Lens in the iOS or Android App store, and here are MS official User Guide for reference:
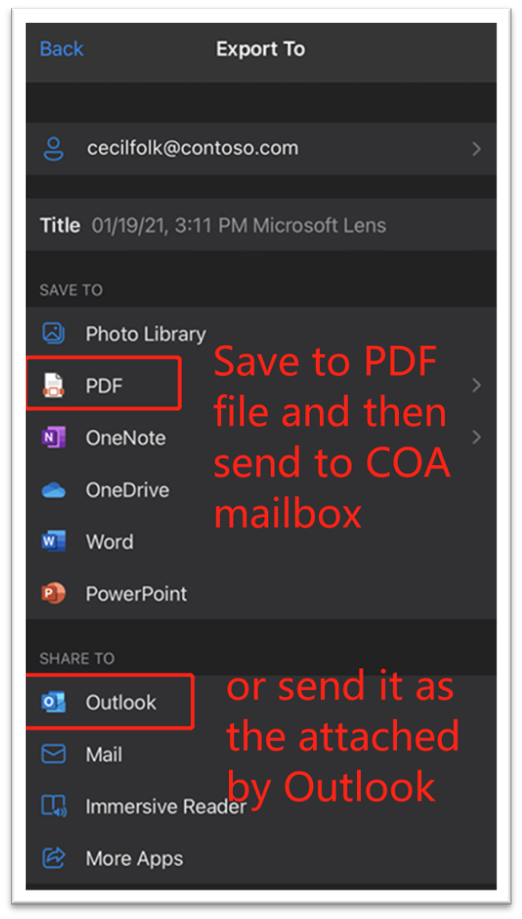
After scanning, users can send the image version or PDF version of scanned copy to the mailbox staging.iff.nbcoa@document-insighter.com(For UAT phase). Please make sure you have read the Email Limitation and Requirements in section 5 Appendix of this User Guide before sending the mail. The system tries to read order # from the document automatically.
3.2 Uploading via Insighter Portal
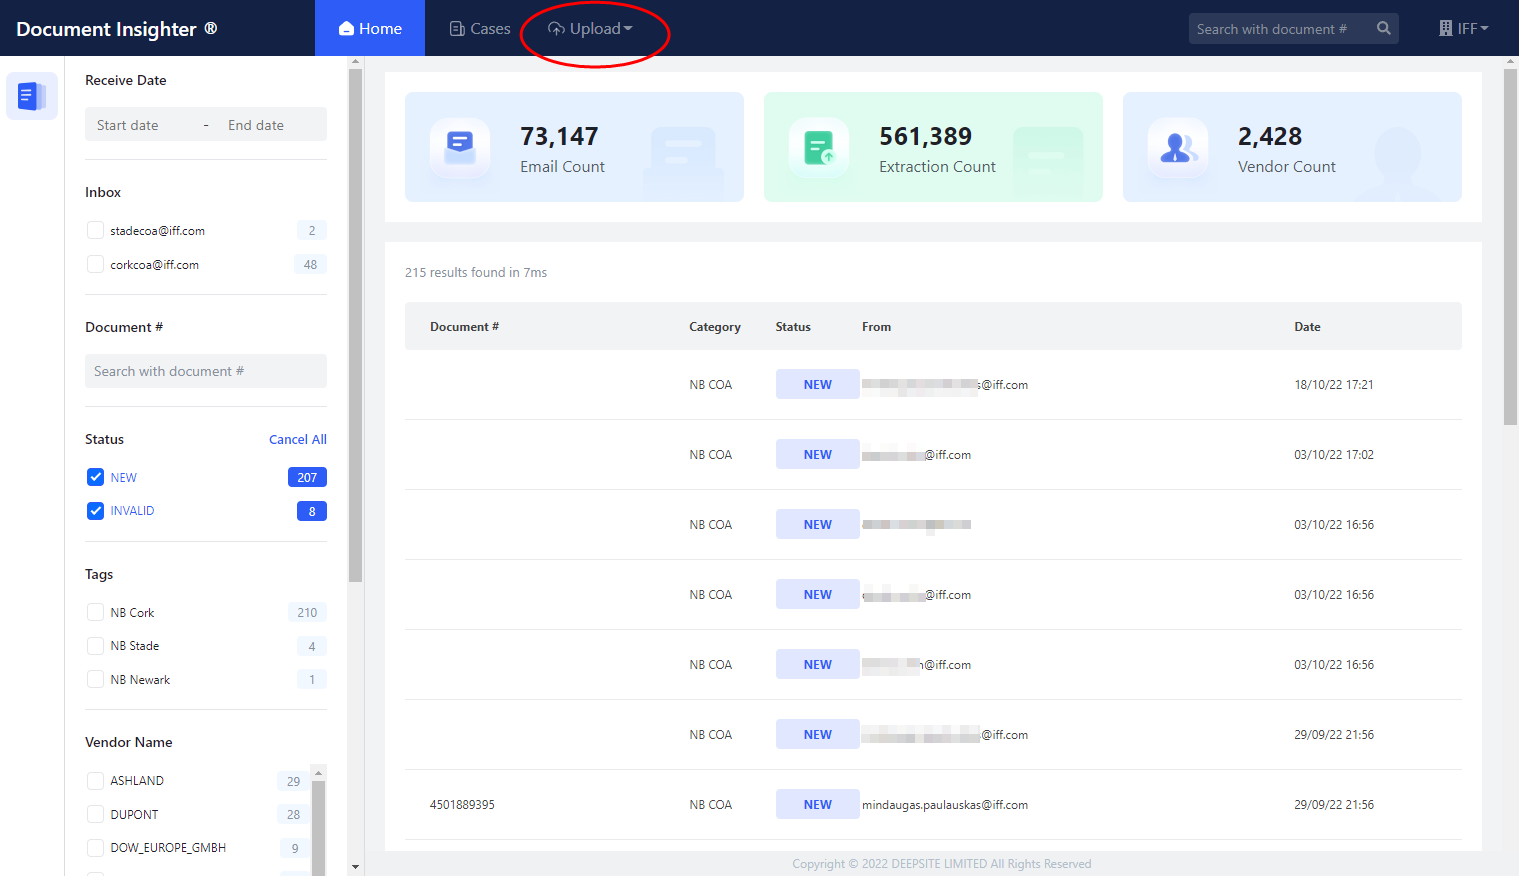
On the homepage of the Insighter portal, users can click the “NB COA” button to manually upload the COA documents:
Users can drag or choose the PDF file to upload the document, ① Users can delete the files from the uploading list. ② The system will try to extract the PO# from the title of the file automatically. If there exist batch information in the document, you can leave it blank. ③ Once the list is ready, remember pick the plant tag for further searching, click the “Upload” button to complete the uploading process.
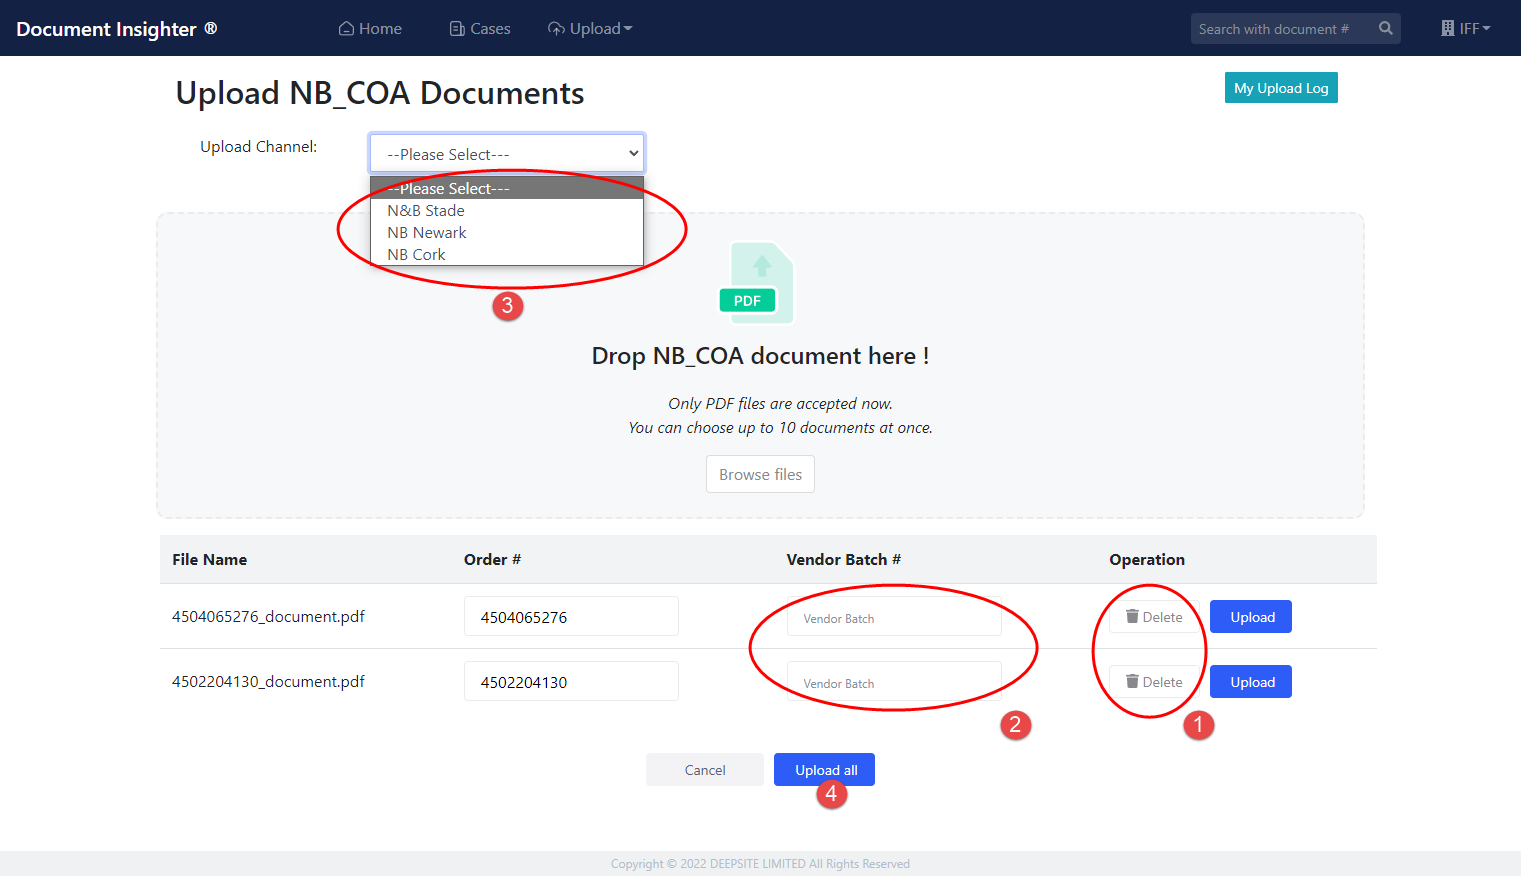
Please note that:
- Only PDF files are accepted now.
- Users can choose up to 10 documents at once.
- Please fill in an Order # (not mandatory) when you upload a file. If the Order # is unavailable, just leave it blank and you may need to use batch # or product name to search the COA.
- The system tries to read the batch number from the document automatically. You can leave it blank if it exists in the document, especially for the multiple batches case, if you type in a specific value, the system will use the one you input to overwrite all of the extracted batch numbers in the document. You only need to fill in batch information if it does not appear in the document.
3.3 Check Uploaded Files Stauts
On the homepage of the Insighter portal, users can click the “Account” button, then click “My Upload Log” to review all the process status of COA documents they uploaded before:

Please note that:
- After uploading the file, if the status is “UPLOADED” means that the system has received the document user uploaded sucessfully.
- A moment later(around 5 mins), refresh the page, the status will become “COMPLETED”, users can check and view the processed results through the filtering function on the homepage. Input your email address to check all your uploaded file and the corresponding results:
4 Technical Support
Help desk information including responsible technical contact phone numbers for assistance is currently available at the following period.
- Phone Support: 9:30 – 18:00 HKT, Mon to Fri
- Email Support (service desk connected): 24-Hours as per Section 3.3 of this agreement.
5 Appendix
5.1 Email Limitation and Requirements
Do not send the same COA document to this mailbox multiple times.
CorkCOA@iff.com is the email address for Cork plant COA extraction only; NewarkCOA@iff.com is the email address for Newark plant COA extraction only; StadeCOA@iff.com is the email address for Stade plant COA extraction only.
Please note that staging.iff.nbcoa@document-insighter.com is only for UAT testing.The system tries to read order # from the document automatically. If the PO# is not present in the document, please write the PO# in the mail subject (not mandatory). Current PO# pattern follows IFF’s: [4501000000 - 4505999999]. If the Order # is unavailable, user may need to use batch # or product name to search the COA.
These email addresses are connected with our automated extracting system. Our colleagues are not checking the query emails here. If you have any COA related question or queries, please contact IFF NB team mailbox.
Please note that our system can read PDF/JPG/PNG/TIF format and the COA documents should be attached directly to the email. The size of one e-mail can’t exceed 5MB. Our system is not able to open attached emails and Zip folders.
If you would like to submit or email multiple COA tests/Batches in one PDF document, please make sure that the PDF document should contain Batch Number for each test batch.